
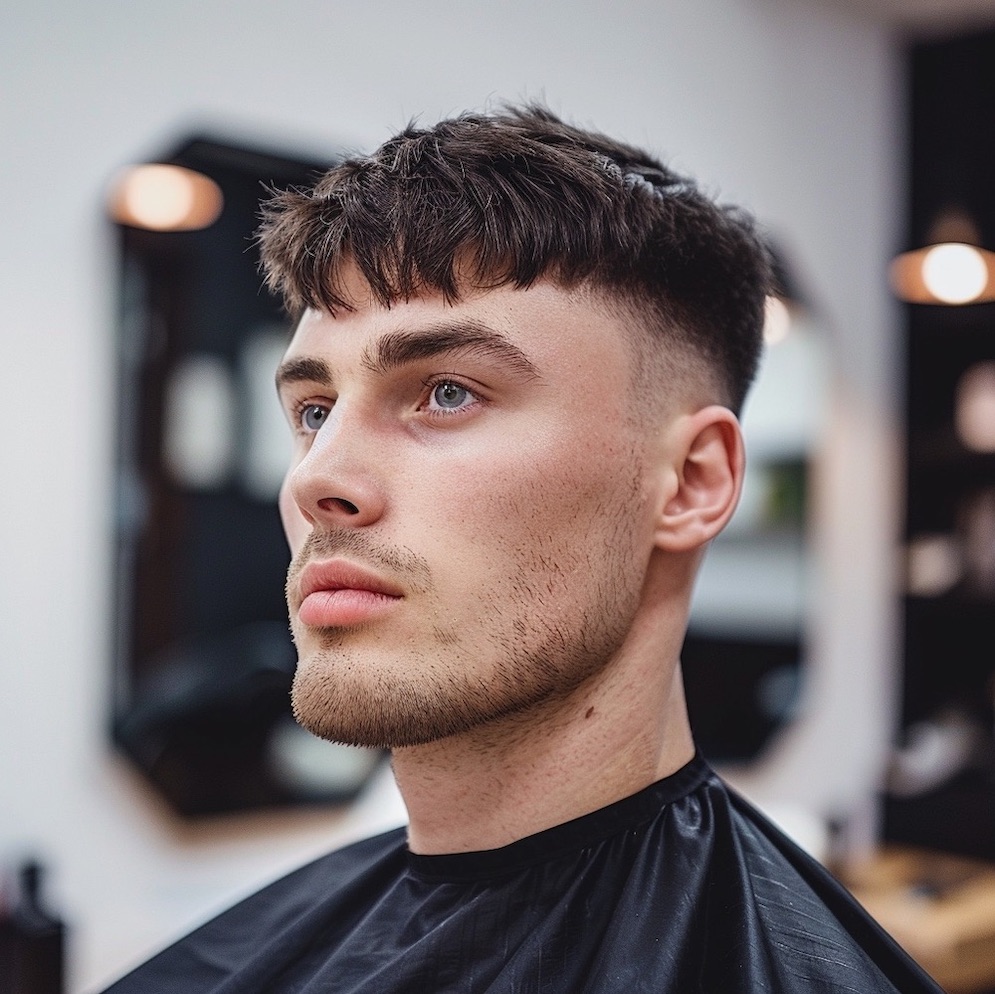
The French Crop is one of those cuts that looks simple but tests a hairdresser's craft in every detail. Short, tightly built sides, controlled length on top, and a signature, textured fringe falling onto the forehead. The whole challenge lies in the proportions, in a clean blend, and in making sure the fringe has texture rather than looking like an evenly trimmed edge. Below you'll find the full breakdown of the cut: from sectioning, through clipper work and scissor work, to texturizing and finishing.
What Is a French Crop?
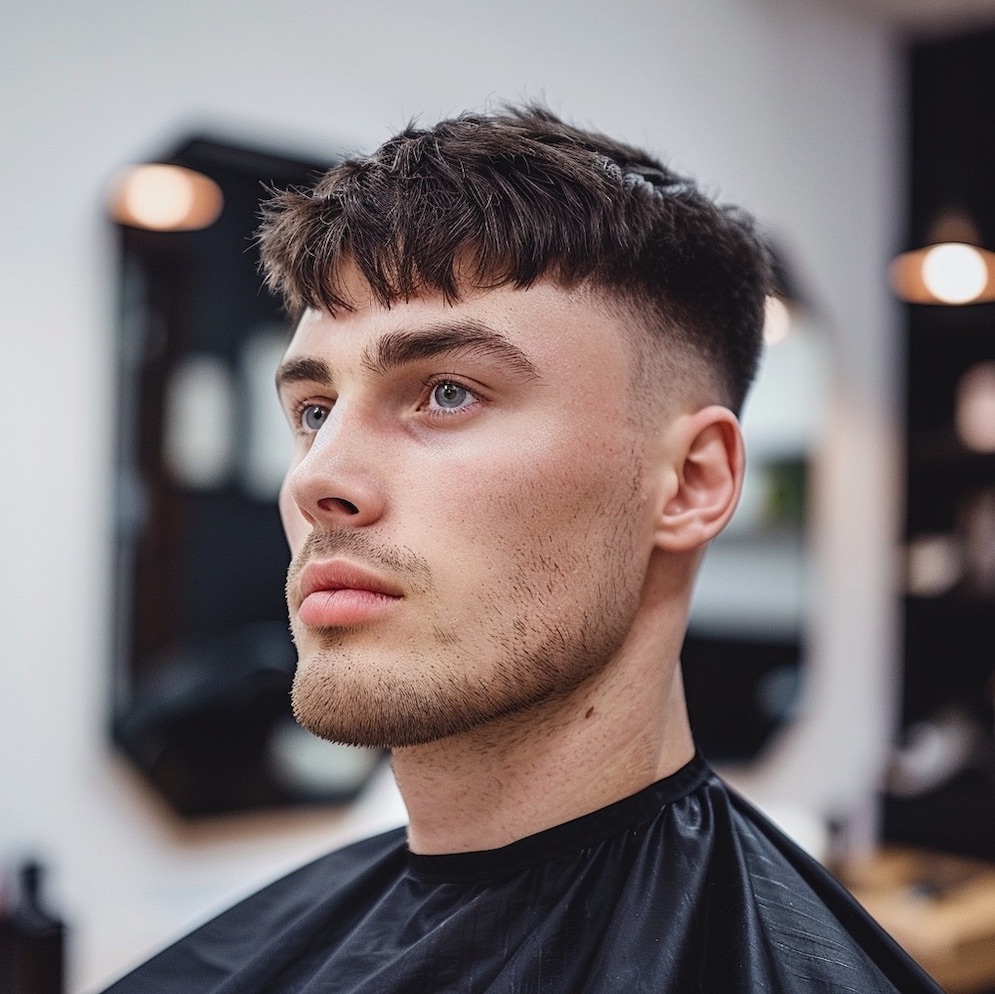
The French Crop is a short men's hairstyle with strong contrast between the sides and the top. The sides and back are shortened with clippers (a fade or a low, conservative cut), while the top stays long enough to be combed forward and shaped into a fringe. The defining feature is exactly that fringe: short, combed onto the forehead, usually textured with a slightly irregular line. The cut works well on straight and slightly wavy hair, and thanks to the short fringe, it also suits clients with a receding hairline, since it covers the temples rather than exposing them.
| Feature | Description |
|---|---|
| Length on top | Usually 2-4 cm |
| Length of sides and back | Can vary, from a very short fade to a longer scissor cut |
| Fringe | Short, often textured |
| Contrast | Clear contrast between the length on top and the sides |
| Texture | Often added for a modern look |
| Versatility | Suits a variety of hair types and face shapes |
Tools Needed for a French Crop
Before you start cutting, make sure you have all the necessary tools ready:
- Sharp hairdressing scissors (5.5 – 6 inches for work on top)
- Texturizing shears (thinning shears) to break up the fringe
- Clippers with a full set of guards (from 0.5 to 3)
- A trimmer for finishing the line-up around the ears and at the nape
- A hairdressing comb (with fine and wide teeth)
- A water spray bottle
- A towel and a hairdressing cape
- A neck brush for clearing away loose hairs
- Styling products (wax, paste, or pomade with a matte finish)
Tool sharpness translates directly into cut quality, especially with point cutting, where dull scissors crush the ends instead of cutting them cleanly. If you want to learn more about keeping your scissors sharp, check out our article on the secrets of maintaining hairdressing scissor sharpness.
Step by Step: How to Do a French Crop
Step 1: Preparation and Consultation
Before you pick up the clippers, agree on two things with the client: how high the contrast on the sides should reach, and how long the fringe should stay. These two decisions define the character of the cut. Also check the crown whorl and the direction of hair growth at the hairline, since this determines how the fringe will fall.
- Wash the client's hair and towel-dry it to a slightly damp state.
- Comb the hair in its natural direction of growth to remove tangles and see how it falls.
- Mark the blend line: comb the hair from the top down onto the sides, and use a finger or comb to mark the height where you want to separate the clipper-cut section from the longer section left on top.
Step 2: Cutting the Sides and Back
You build the sides and back from the shortest length at the bottom of the fade to the longest at the blend line. Work with the clippers held flat, moving from bottom to top, lifting the blade away from the skin at the end of each stroke so you don't leave a hard edge.
- First, remove the bulk: using guard number 2 or 3, cut the hair on the sides and back up to the marked blend line, working against the direction of growth.
- Establish the bottom line of the fade. Using a shorter guard (0.5 – 1), go lowest around the ears and at the nape, deciding whether this should be a high, mid, or low fade.
- Build the blend by working through the guards in sequence, for example 1 – 1.5 – 2. Take each successive length higher than the previous one, and at the point where two lengths meet, flick the blade outward to soften the border.
- Eliminate any visible demarcation lines. With no guard, using an open blade, go over the zones where lengths meet with the clipper over comb technique, angling the comb at different points and cutting off the stray hairs.
If you want a more striking effect with a strong, focused blend behind the ear, you can apply the burst fade technique.
Step 3: Cutting the Top
You cut the top on damp hair using the scissor over fingers technique, working in sections. The key is a consistent, controlled elevation and a single guideline that you reference for every subsequent section.
- Start at the back of the top area, at the crown whorl. Pull the first section straight out over your fingers, set your guideline length (usually 2 – 4 cm), and cut.
- Work in sections toward the forehead, each time picking up a bit of previously cut hair from the prior section as your reference. Keep your fingers parallel to the curve of the skull to maintain a consistent length across the head's curvature.
- Leave the front and the fringe longer than the rest of the top. These will build the signature, falling finish of the French Crop.
- Cross-check your work: comb the top first to the sides, then forward and back, and catch any single longer hairs sticking out from the even surface.
Proportion is determined by the relationship between the length on top and the height of the blend on the sides. The lower the fade goes and the shorter the top, the sharper and more urban the character of the cut. You'll find more on men's cutting techniques in our article on men's cutting techniques from classic to modern.
Step 4: Creating the Fringe
The fringe is the calling card of this cut, so it's worth doing this part on dry hair. Wet hair is longer and falls differently than it does once dry, so it's easy to cut the fringe too short. Working dry gives you full control over the final line.
- Comb the front forward, following the natural direction the hair falls, and let the fringe settle the way it will sit once dry.
- Mark the bottom line of the fringe. For most clients, it looks good at mid-forehead height or slightly higher, but adjust it to the forehead height and face shape.
- Instead of cutting straight across, cut the fringe with vertical point cutting, directing the tips of the scissors toward the cutting line. This way you'll avoid a hard, even edge.
Step 5: Texturizing
Texturizing removes weight, separates the strands, and gives the fringe that slightly undone, modern character the French Crop is known for. You work dry, in small amounts, and with control, because it's easy to overdo the texture.
- Go over the entire top surface with point cutting, driving the tips of the scissors vertically into the hair. This breaks up the uniform mass and eliminates the helmet effect.
- On thick, heavy hair, use deep point cutting or spot thinning shears to remove weight near the base of the ends. On fine hair, texturize sparingly, since over-thinning will strip away density.
- Concentrate the texture on the fringe and front, where movement is most visible, and leave the back of the top more compact.
Texturizing is key to the modern look of the French Crop. If you want to expand your knowledge of working with volume and form, consider joining our course Shaping Volume and Form in Men's Cutting.
Step 6: Finishing and Line-Up
- With the trimmer, clean up the line around the ears, following the natural hairline so you don't expose too much skin.
- At the nape, decide on the finish together with the client: a rounded line-up, a square line-up, or a naturally tapered edge (with a French Crop, a soft, tapered finish usually looks best).
- Check the symmetry of both temples by positioning yourself directly behind the client and comparing the line height on the left and right sides.
Step 7: Styling
- Blow-dry the hair partially, directing the airflow forward and slightly down to set the fringe in its intended direction.
- Rub a small amount of matte product (wax or paste) between your palms and spread it evenly, working from the roots to the ends.
- Shape the top with your fingers, separating the strands to bring out the texture. Comb the fringe forward, and you can lift the front slightly so the cut doesn't look flat.
Tips for Professionals
- Adapt to the face shape: The French Crop can be adjusted for face shape. For a round face, leave a bit more length at the front and cut the sides shorter to visually elongate the features. For a long face, leave a fuller fringe and a softer contrast so as not to exaggerate the length.
- Account for hair type: On fine hair, texturize sparingly and leave a bit more weight to build the illusion of density. On thick, coarse hair, remove more weight with thinning shears or deep point cutting, otherwise the fringe will stick out instead of falling.
- Educate the client: Show them how to style the haircut at home with one hand in a few seconds, and recommend a product with the right finish. The French Crop looks best with matte products, since shine flattens the texture.
- Keep track of appointment cycles: The French Crop loses its shape as the fade grows out. Let the client know that a touch-up every 3-4 weeks will keep the contrast and proportions clean.
- Experiment with different fade techniques: The French Crop pairs beautifully with various types of fades, such as a taper fade or a skin fade.
Common Mistakes When Doing a French Crop
These mistakes most often ruin the result, even when the rest of the cut is done correctly:
- Hair too long on top: The French Crop relies on the proportion of a short top to shortened sides. If the top is too long, the cut turns into an ordinary short hairstyle with a fringe and loses its character.
- Lack of texture: A smoothly cut top looks like a helmet and falls stiffly. Without point cutting and separated strands, the haircut loses its modern edge.
- Too sharp a fringe line: An evenly trimmed fringe cut straight across looks harsh and artificial. Vertical point cutting gives a soft, irregular edge that looks natural.
- Visible demarcation line: A hard border between the length of the sides and the top gives away an unrefined blend. Soften it with the clipper over comb technique and by lifting the blade at the end of each stroke.
- Ignoring the crown whorl and growth direction: Cutting against the natural direction of the hair makes the fringe stick out or split. Always work in line with how the client's hair grows and falls.
Styling and Maintenance of the French Crop
To help clients maintain the perfect French Crop look, pass along the following tips:
- Daily styling: A small amount of matte paste or wax is enough. The product is best applied to slightly damp, partially dried hair, rubbed between the palms, and shaped into the fringe going forward.
- Washing: Recommend washing 2-3 times a week with a gentle shampoo. Daily washing strips the hair of its natural oils and dries out the scalp.
- Drying: The French Crop can be air-dried for a softer result, or blow-dried with the airflow directed forward for greater control over the fringe.
- Refreshing between appointments: The client can touch up the line-up around the ears and at the nape themselves with a trimmer, keeping the cut looking fresh until the next visit.
- Scalp care: A healthy scalp is the foundation of well-behaved hair. With short sides, it's easy to dry out the skin, so it's worth recommending hydration and gentle products.
If the client pairs the French Crop with facial hair, you'll find more grooming tips in our complete grooming guide.
French Crop Variations
The French Crop is easy to adapt for a specific client. Here are a few popular variations:
- Textured Crop: A more heavily textured top with pronounced movement in the strands. A choice for clients wanting a spikier, more modern look.
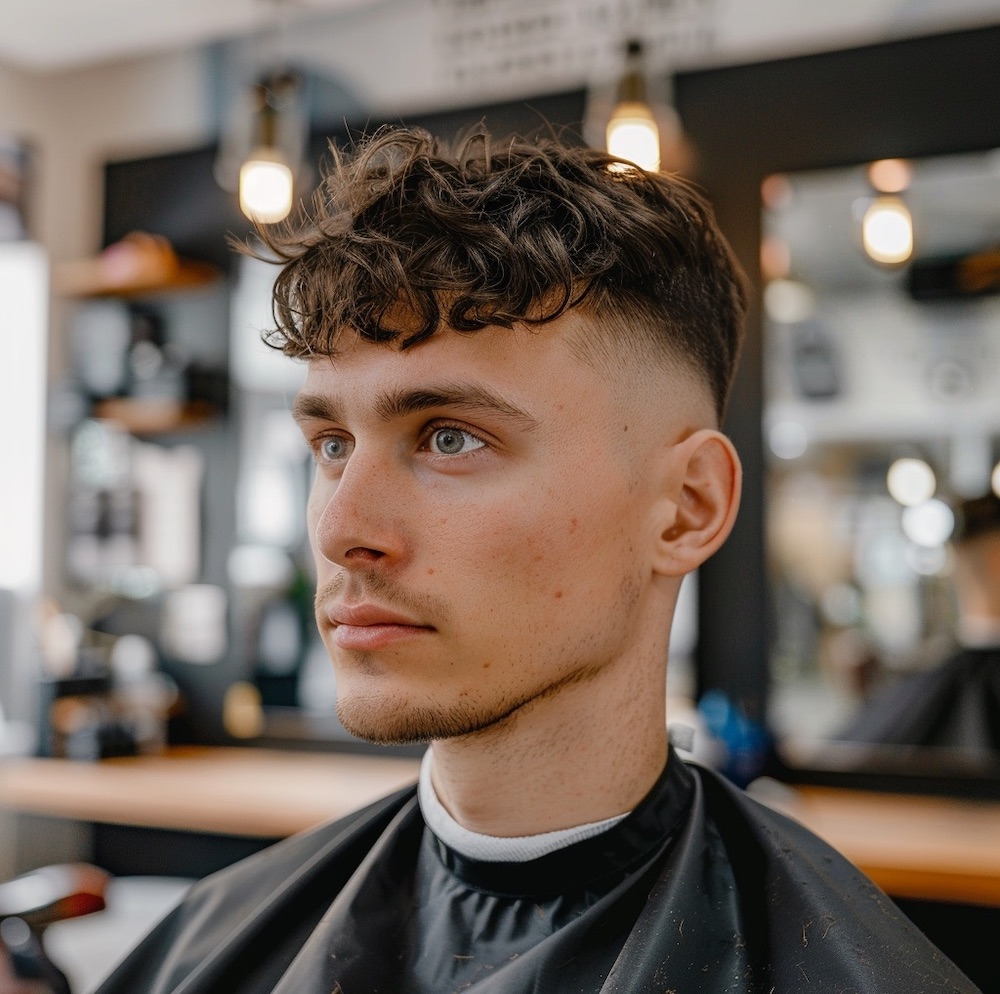
- French Crop with a fade: A classic top paired with a fade on the sides and back, from a taper to a skin fade, for stronger contrast.
- Long French Crop: A slightly longer top and a fuller fringe, giving more styling freedom and a softer character.
- French Crop with a part: A subtle part (either trimmer-defined or natural) gives the cut a more elegant, formal edge.
- Asymmetric French Crop: A fringe worked at an angle or swept more heavily to one side, for bolder clients who appreciate an unexpected shape.
When choosing a variation, always consider the face shape, hair type, and how much time the client will realistically spend on styling. Even the most striking variation won't pass the test if the client can't recreate it at home.
Refining Your Skills
A clean, repeatable French Crop takes practice, especially with the blend and texturizing. Here are a few ways to develop your craft:
- Online courses: Consider taking online hairdressing courses that let you learn the latest techniques and clipper work step by step.
- Practice on mannequins: Practice fades and point cutting on a training head, where you can repeat the same movements without the risk of a mistake on a client.
- Collaborating with other hairdressers: Watching experienced barbers at work and exchanging feedback speeds up learning more than theory alone.
- Following trends: The French Crop keeps evolving alongside trends in fades and texture, so it's worth staying current with what's happening in men's hairdressing.
- Client feedback: Ask how the haircut holds up after a few days and whether it's easy to style. This is the fastest way to see what needs improving in the cut.
If you want to build a solid foundation in men's cutting technique and working with form, check out our online courses and our blog, where we regularly share techniques and trends from the industry.
See it in practice: in the French Crop course with Miłosz Mikołajczak you'll follow the entire process step by step on a model, with commentary from the educator.


