
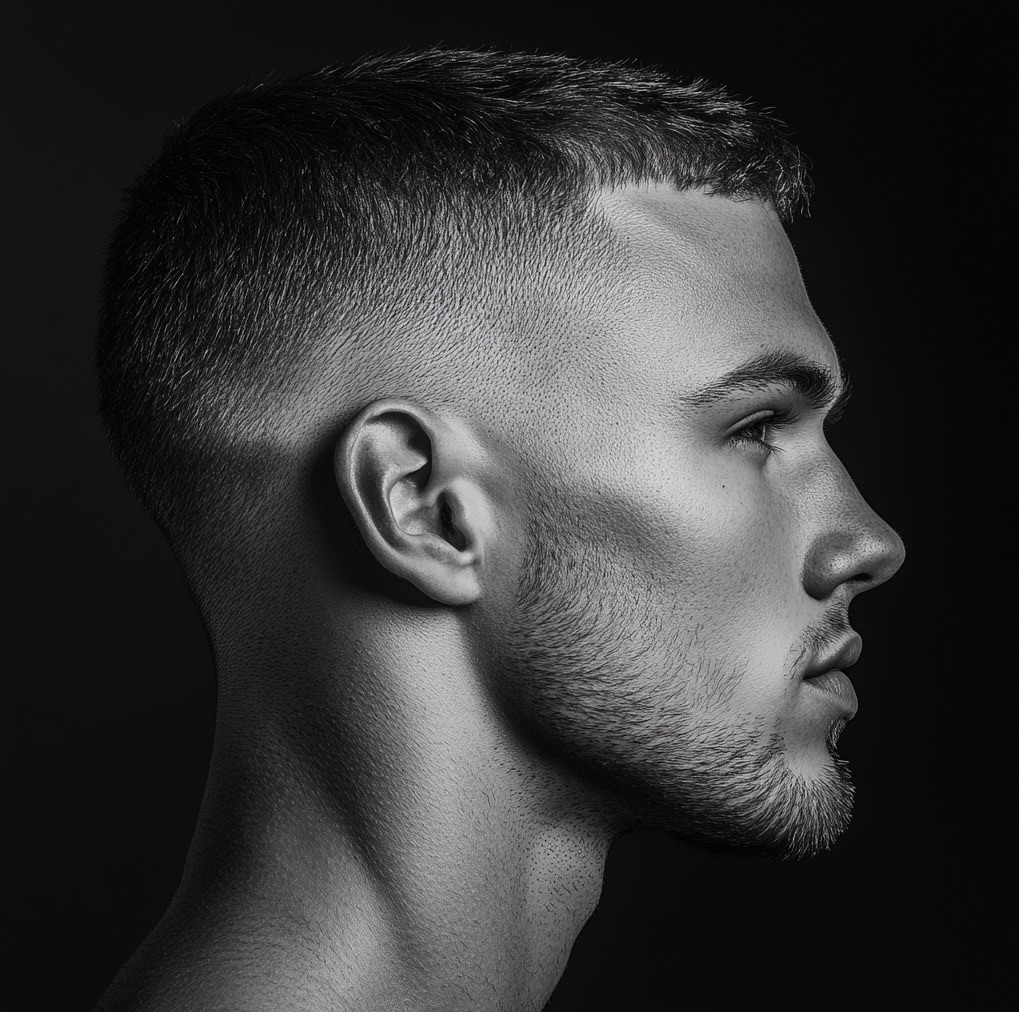
The Mid Fade is the most versatile fade graduation in men's haircutting. The transition starts roughly at temple height, between the top of the ear and the temporal bone, which makes it work with most head shapes and any length on top — from a short crop to a pompadour. Below you'll find the full procedure: from setting the line, through sectioning and working the clipper lever, to blending with a comb and scissors. Written so it can be replicated behind the chair, not just read.
What Is a Mid Fade and When to Choose It
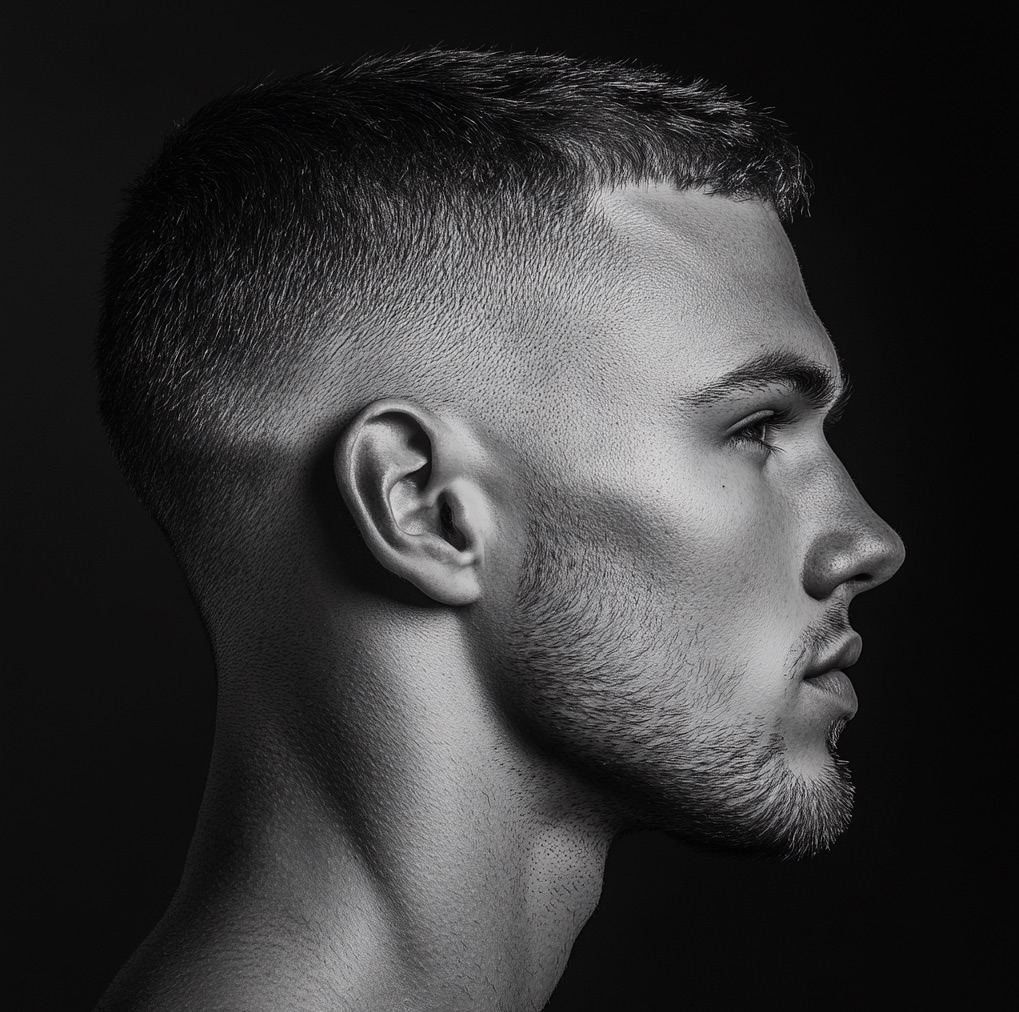
The Mid Fade is a graduation technique where the transition from skin (or very short hair) to a longer length starts halfway up the side of the head, around the temple area. It's a middle position between the Low Fade, which starts low above the ear, and the High Fade, which runs high toward the crown.
The practical difference is this: the Mid Fade leaves more hair weight on the sides than the High Fade, so it doesn't visually narrow the head and forgives irregularities in skull shape. It works well for round and square faces, since it doesn't visually raise the temple line as aggressively as the High. If a client has protruding ears or hollows behind the temples, the Mid gives you room to mask them with length — something the High Fade doesn't allow.
Tools Needed to Create a Mid Fade
Before you start, prepare your equipment and set up your station. The clippers should have a charged battery and an oiled blade, and the trimmer should be sharp — a dull blade leaves lines and pulls the hair instead of cutting it.
- Clippers with various guards (0.5, 1, 1.5, 2, 3) and a working taper lever
- Trimmer (liner) for finishing the line-up and clean lines around the ear and nape
- Hairdressing scissors and blending shears for graduation
- A fade comb (thin, with fine teeth) and a wide comb for the top
- A brush for sweeping hair off the nape and the blade
- Tool disinfectant spray
- A blow dryer and styling brush
- Styling products (wax, pomade, spray)
You'll find more information about the right tools and their care in our article How to Care for Hairdressing Tools: A Guide for Professionals.
Preparing for the Haircut
Client Consultation
- Determine where the transition should start. The Mid Fade has a wide range, so ask whether the client wants it closer to the ear (lower) or closer to the temple (higher), and point to where you'll set the line in the mirror
- Establish the lowest value: skin (down to the scalp) or the shortest guard. This determines how much blending work goes into the bottom
- Assess head and face shape — with a flat back of the head, avoid removing weight too low; with a protruding occipital area, add more graduation
- Establish the target length on top and the styling approach, since this determines the proportion between top and sides
Preparing the Hair
- Cut on dry hair or slightly damp hair. A fade cut wet shrinks once it dries, and length control becomes deceptive — wet hair lies flat and hides irregularities
- Comb the hair in the direction of natural growth to see how it actually falls
- For very thick or long sides, divide them into sections and clip the top up so it doesn't fall into the fade zone
Hair Analysis
- Check the growth direction at the temples and nape — hair often grows at an angle, and clippers moved against the grain will cut differently than with the grain
- Locate cowlicks (unruly tufts) and whorls. Leave slightly more length in these spots, since the hair will spring back and reveal a gap in the fade
- Assess density. Thin hair exposes the scalp faster, so plan a gentler start to the fade to avoid creating a bald patch
Step by Step: How to Create a Mid Fade
Step 1: Setting the Transition Line
- Mark the midpoint on the side of the head, roughly halfway between the top edge of the ear and the temporal bone. This is the upper boundary of the graduation zone
- Mark this height symmetrically on both sides — the easiest way is to reference it against a fixed point, such as the top edge of the ear, so both sides come out at the same level
- Remember that the Mid Fade runs in an arc around the head, rising slightly toward the back above the ear — don't cut it in a straight horizontal line
Step 2: Creating the Lowest Fade Line (Guideline)
- First, remove all the weight below the transition line to a uniform short length — this takes off the bulk and gives you a clean start. Use guard #1 or #1.5, depending on what was agreed
- Next, set the lowest line (baseline) using clippers with no guard or guard #0 around the ear and at the nape
- Run the clippers flat against the skin only at the very bottom. You'll be blending this value upward later — this is your darkest reference zone
Step 3: Starting the Graduation from the Bottom
- Fit guard #1 and work from the bottom upward, stopping about 2-3 cm below the marked transition line
- Use a flicking motion — drive in deep, and at the end of the stroke flick your wrist away from the head, so the clippers don't leave a sharp edge but gradually ease out of the hair
- Work in overlapping sections, running the clippers against the direction of hair growth. Follow an arc that mirrors the shape of the skull, not a straight line
Step 4: Building the Middle Transition Zone
- Switch to guard #2 (or #1.5 as an intermediate step for thick hair)
- Work from the bottom up again, but this time stop higher — just below the transition line. Each longer guard should reach higher than the previous one. That's how you build the gradient
- The most important part is the zone where #1 and #2 meet. Use the flicking motion with a lighter bite there to blend the border between the two lengths instead of creating a step
Step 5: Blending (Softening the Lines)
- Open the taper lever on the clippers and, without a guard, go over any visible demarcation lines. The lever gives you lengths between the guards and lets you literally blur the border
- Apply clipper-over-comb: hold the comb at an angle to the head and run the clippers over the spine of the comb. By changing the comb's angle, you control how much hair you remove at a given height
- Finish freehand: using clippers with no guard and a flicking motion, target the specific spots where a jump in length is still visible. Check the result from different angles and under side lighting, which reveals lines
Step 6: The Top of the Haircut
- Move to the top and cut with scissors using scissor-over-comb, or on elevated sections, controlling length through tension on the comb
- Make sure the top blends with the sides at the temple area. If the top is to stay longer, leave a gentle taper there so no sharp edge forms above the fade
- Adjust the length and style to the client's preferences. For volume and movement, apply texturizing techniques
Step 7: Finishing the Line-Up
- Use the trimmer to cut a clean line-up around the ear and at the nape. Guide the blade in one confident, continuous line — going over the same edge multiple times raises the line and makes it thick
- Check symmetry on both sides by looking at the client from behind and comparing the transition height relative to the ears
- Brush away loose hair, dampen your fingers or the blade, and go over the fade once more against the light, removing any stray hairs and the last irregularities
Advanced Blending Techniques
Once you've mastered the basic gradient, these techniques deliver what separates a clean fade from an average one — no visible lines and a soft transition that holds up as the hair grows out.
Working the Lever (the “Halfsie” Technique)
- The taper lever creates lengths between standard guards. Set it halfway and go over the zone where two guards meet — you get an in-between value that no single guard can produce. It's the fastest way to eliminate the step between #1 and #2
Point Cutting with Scissors
- Cut the ends vertically, driving the scissor tips into the section rather than cutting straight across. This softens the hard edge where the top meets the sides and gives a more natural transition than a straight-line cut
Slicing with Clippers
- With the clipper lever open (blade retracted), glide gently over the hair in a combing motion. This removes only the longest hairs sticking out of the gradient and evens out the zone without cutting a new line
Blending Shears
- Blending shears with widely spaced teeth pick up part of the hair while leaving the rest. Use them at the blend zone to break up any remaining line and achieve an ultra-smooth transition, especially on thick, straight hair
Learn more about advanced cutting techniques in our course Shaping Volume and Form in Men's Haircutting.
Styling and Finishing
Blow-Drying
- Blow-dry the hair in the direction it should ultimately fall, guiding it with a brush or your fingers. This is the stage where you set the root volume and the direction of each section
- Finish with a blast of cool air to lock in the shape before applying product
Styling Products
- Choose the product for the effect you want: matte wax or clay for texture and a natural finish, pomade for shine and a sleek, combed-back look
- Rub the product between your palms and apply it from the back of the head toward the front, spreading it at the root first and then styling the ends — too much product at the top weighs the hairstyle down and flattens it
Final Touches
- Use the trimmer to refine the line-up if styling has revealed any irregularities around the ear or nape
- Spray the hairstyle with a light hairspray to lock it in, holding the can at a distance so the hair doesn't clump
You'll find more styling advice in our article How to Style Men's Hair: Tips for Clients.
Common Mistakes and How to Avoid Them
- Visible demarcation lines — a jump between lengths. Fix: go back to the blend zone with the taper lever and clipper-over-comb, softening the border with a flicking motion instead of cutting a new line
- Asymmetry — one side starts higher. Fix: reference the transition height against a fixed point (the edge of the ear) and check both sides from behind throughout the process, not just at the end
- Mismatch with head shape — running the clippers in a straight line instead of an arc. Fix: analyze the skull structure before starting and follow its curve, adding graduation over a protruding occipital area
- Fade too high or too low — misread client expectations. Fix: precisely agree on and show the transition line in the mirror before the first pass of the clippers
- Bald patch at the bottom — too aggressive a start on thin hair. Fix: with low density, start the fade with a longer guard and taper down more gently instead of going straight to the skin
Maintaining the Mid Fade
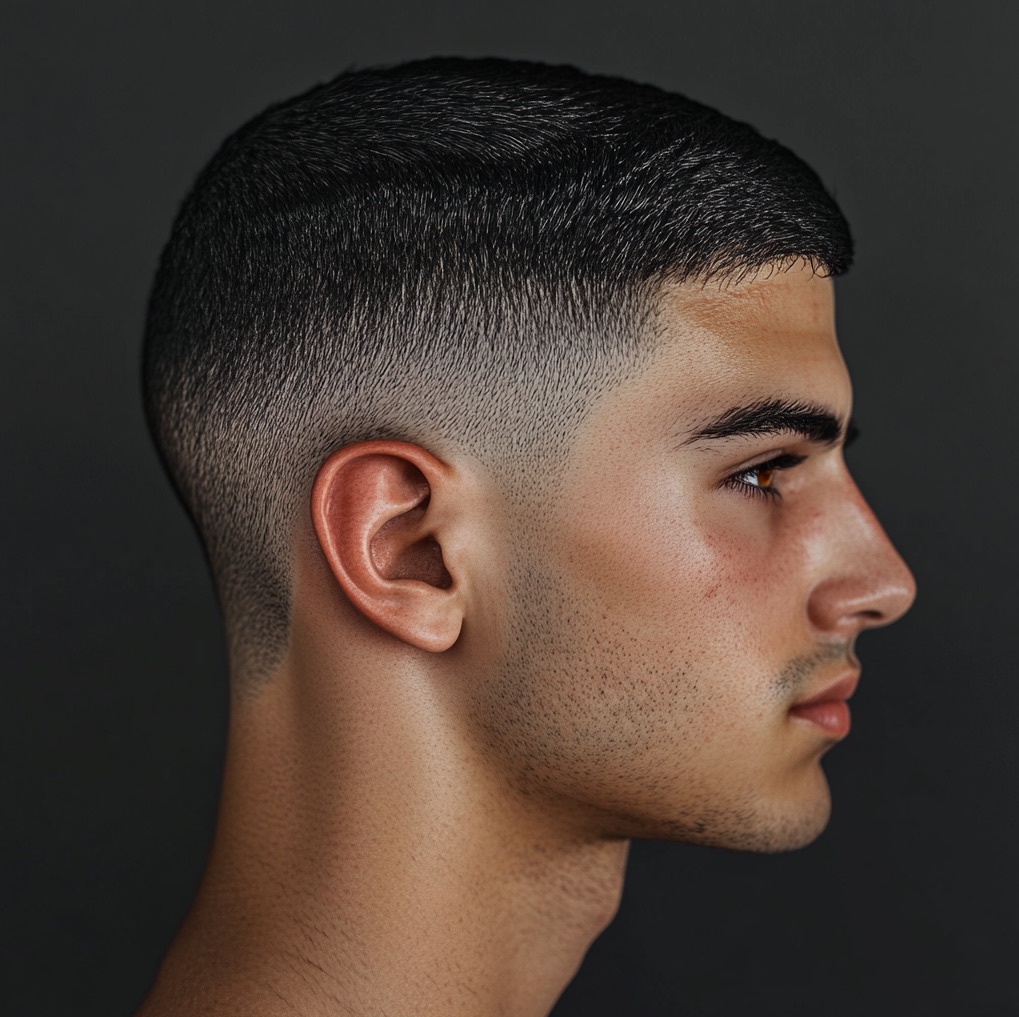
The Mid Fade loses its crispness after 2-3 weeks, as the bottom grows out and the gradient blurs. Let your client know how to maintain the result between visits:
- Touch-ups every 2-3 weeks — the fade itself grows out faster than the top, so often a refresh of the sides is enough without touching the length up top
- Daily styling with a product suited to the hair type, to maintain the direction set during blow-drying
- Protecting freshly shaved skin from the sun, especially where the fade starts at the skin at the bottom
- Moisturizing the scalp to avoid irritation and ingrown hairs in the shortest-cut zone
You'll find detailed care advice in our complete grooming guide.
Mid Fade Variations
The Mid Fade is versatile enough to pair well with most shapes on top. The most common combinations:
- Mid Fade with a textured crop — a short, choppy fringe with a fade on the sides, low styling maintenance
- Mid Fade with a pompadour — volume and height up front, with the fade emphasizing the contrast between top and sides
- Mid Fade with a quiff — a lighter, less formal alternative to the pompadour
- Mid Fade with a side part — a classic, business-appropriate look with a clear parting
See it in practice: in the Fade course with Kacper Trzaskowski you'll follow the entire process step by step on a model, with commentary from the educator.
Summary
A clean Mid Fade comes down to three things: a well-set, symmetrical transition line, consistently building the gradient from a shorter to a longer guard, and patiently blending the borders with the lever, comb, and scissors. Every client has a different hair growth direction, density, and head shape, so you tailor the starting line and the pace of the fade individually.
If you want to refine your skills in different types of fades and other men's cutting techniques, check out our online hairdressing courses. You'll find courses there that break advanced techniques down step by step and show them on real models.


