
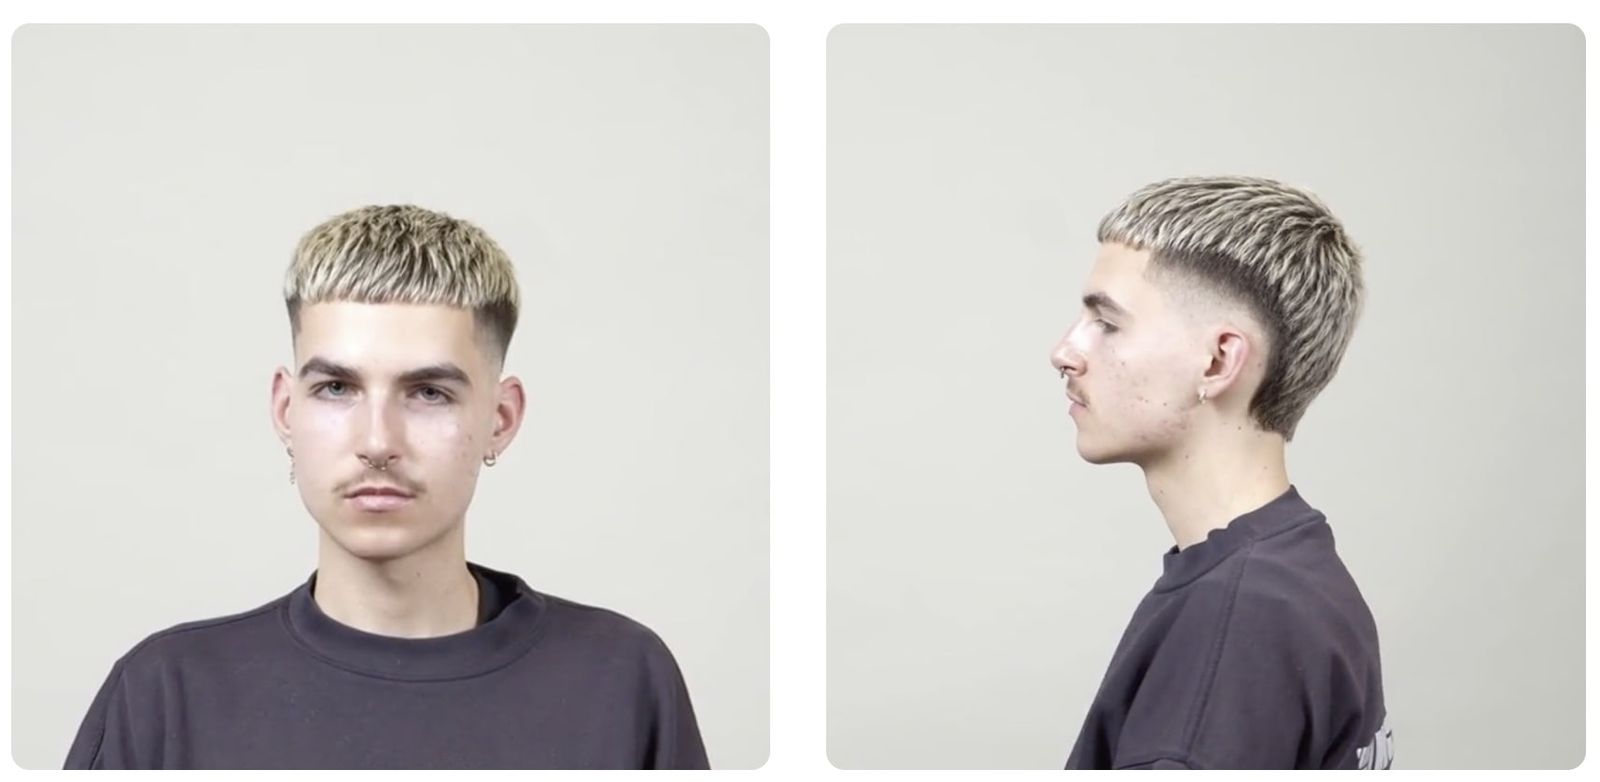
Burst Fade is a haircut where the fade doesn't run horizontally around the whole head, but curves behind the ear and “bursts” radially toward the nape. The short temple blends smoothly upward behind the ear, while the back stays fuller and slightly rounded. The result is softer and more dynamic than a classic low or mid fade, which is why it looks especially good on textured hair. Below you'll find the full technique: sectioning, guard selection, clipper angles, and finishing. If you want to practice it under an educator's guidance, check out our hairdressing courses.
What Is a Burst Fade?
The Burst Fade is a fade variation where the shortest cutting point is concentrated around the ear, and the transition radiates in an arc along the side and back of the head. Key features of this shape:
- A radial, “fan-shaped” transition running from the ear toward the nape, instead of a straight, horizontal fade line
- The shortest length concentrated at and above the ear, with a soft upward blend
- A fuller, rounded back, often without a sharp line at the nape – the nape is tapered rather than cut with a hard edge
- Preserved length and volume on top, meant to emphasize the contrast with the short sides
The key difference from a regular fade lies in the geometry: instead of running the transition in one plane around the head, you rotate it around a point behind the ear. That's why the work at and behind the ear needs to be planned separately before you move on to the rest of the sides.
Learn to Cut the Burst Fade at Pro Academy
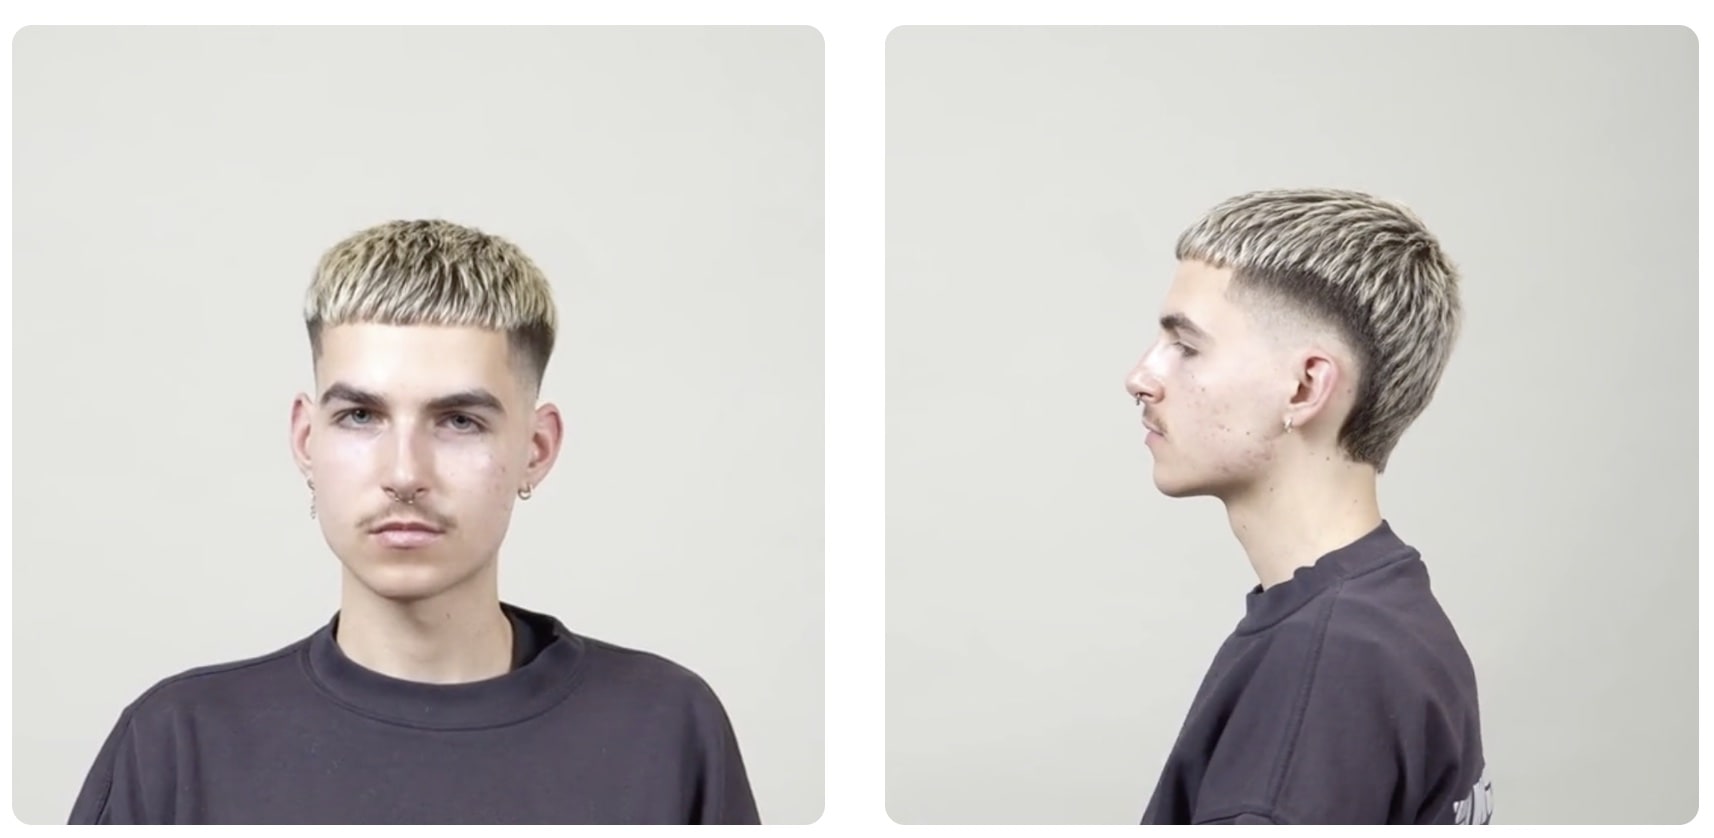
How to Do a Burst Fade Step by Step
1. Preparation and Hair Assessment
Cut the Burst Fade on washed and dried hair. Wet or damp hair shortens the apparent length and hides the growth direction, so once it dries the transition will open up and reveal lines. Before you pick up the clippers, read the client's head:
- Check the growth direction around the ear and at the nape – with a burst fade, this zone is what determines the result. Cowlicks and whorls behind the ear can break up the arc if you don't account for them.
- Assess density and texture. Thick, coarse hair holds contrast well, while fine hair shows the scalp through sooner, so start a little higher to avoid going too low.
- Pay attention to color and any lightening – on colored hair the scalp shows through more, and any unevenness in the transition is more visible.
- Agree with the client on the height the “burst” should reach behind the ear – this sets the upper boundary of the transition.
2. Sectioning and Initial Shortening
Use a comb to separate the top from the sides, running the parting where you want to keep the length, and clip the top out of the way. First remove weight from the sides and back down to one guiding length – this is the base you'll build the transition on.
- Start with guard number 3 or 2, running the clippers against the grain, evenly and without pressing in, to bring down the upper length of the sides and back.
- Leave the top and the area above the future “burst” untouched – this is where the volume that creates the contrast should stay.
- Already at this stage, mark the arc around the ear – outline a preliminary line along which the transition will radiate toward the nape. This is your reference point for the entire cut.
3. Building the Radial Transition (Burst)
This is where the whole character of the haircut takes shape. You run the transition not horizontally, but fan-like: the shortest point stays at the ear, and the lengths increase radially upward and toward the nape.
- Set the lowest guideline with the clippers with no guard or on zero, working right at the ear and running it in an arc toward the back – this is the shortest point of the entire transition.
- Move up through progressively longer lengths (0.5, 1, 1.5), leaving more hair each time than in the previous pass. Each higher length ends a little higher than the one before it.
- Work with the flicking technique: go into the weight, and at the boundary between lengths, gently tilt the blade away from the head so you don't leave a hard line. Round the movement to follow the arc of the ear, not vertically.
- Behind the ear, follow the clippers along the curve of the head and rotate your wrist – it's this rotation that builds the “burst.” At the back, don't cut a hard line at the nape; instead, taper the length down to the skin so the back stays soft and rounded.
- Check symmetry on both sides: step back every so often, look at the head from behind, and compare the height and angle of the arc on the left and right. Close out the transitions with clipper-over-comb to soften the boundaries between lengths.
4. Working the Top
The top needs to work with the short sides, but it's what creates the contrast, so don't take it too short. Work dry, in sections, checking the shape against the transition you've already built.
- Shorten and weigh out the top with scissors, working scissor-over-fingers and checking the length against the stationary guide.
- Texturize the ends – with thinning shears or point cutting – to remove bulk and weight while keeping the length. On thick hair, this step decides whether the top will move naturally or sit stiff.
- Leave a little extra length at the crown and in the top-to-side transition zone, so it can be combed over to cover the boundary with the fade.
5. Line-Up, Finishing, and Styling
- Refine the hairline with a trimmer: temple, ear area, and nape. Remember that with a burst fade the nape usually stays soft – if the client doesn't want a hard line, just taper it instead of cutting a straight edge.
- Check the arc around the ear on both sides at the client's eye level – this is the most common spot for asymmetry.
- Blow-dry and style the top with matte paste or pomade, choosing the finish based on how the client wears their hair – back, to the side, or textured. A burst fade looks good both slicked back smooth and with a broken-up, natural texture.
Who Is the Burst Fade Right For?
The Burst Fade is versatile, but it works best in specific cases. It's worth knowing these so you can advise your client confidently behind the chair:
- Textured and curly hair – the soft, rounded transition works beautifully with curl pattern and doesn't flatten volume, making the burst fade one of the most rewarding cuts for this hair type.
- Clients with thick hair – the short sides remove weight and make volume easier to control, while the top stays full.
- Round faces – concentrating the shortest length at the ear and keeping the top fuller adds vertical lines and visually lengthens the face.
- Clients looking for a bold, modern look – the burst fade adds energy and pairs well with a crop, a mullet, or a slicked-back style, making it a great fit at any age for refreshing an image.
Frequently Asked Questions
How Often Should You Refresh a Burst Fade?
To keep the transition's contrast crisp, it's worth refreshing the fade every 2-3 weeks. After that, regrowth blurs the shortest point at the ear and the arc loses its definition, even if the top still looks fine.
Does the Burst Fade Suit Curly Hair?
Yes, in fact it's one of its strongest applications – the soft transition holds up well across different textures, including tight curl patterns. If you want to work more confidently on curly hair, check out the course Bringing Out Curl With Circular Cutting.
How Long Does a Burst Fade Take?
For an experienced hairdresser, the cut usually takes about 30-45 minutes. Building a symmetrical arc behind the ear and closing out the transitions takes the most time, so when you're still learning it's realistic to plan for longer.
Sharpening Your Skills
The Burst Fade relies on a well-mastered fade, reading growth direction, and confident clipper work along a curve, so the fastest way to lock it in is by practicing controlled transitions and finishing. If you want to raise the level of these fundamentals, our hairdressing courses include:
- Hair Graduation and Texturizing Techniques
- Shaping Volume and Form in Men's Haircutting
- Triangular Graduation With a Square Back Plane
Join the Connected Hair Academy and build your craft with real techniques from working professionals.
If you want to expand your men's cutting repertoire, also check out these courses:
At the Connected Hair Academy you'll also find courses on coloring and skincare that will help you work with clients comprehensively.
See it in practice: in the Burst Fade course with Kamil Cesarski you'll follow the entire process step by step on a model, with commentary from the educator.


