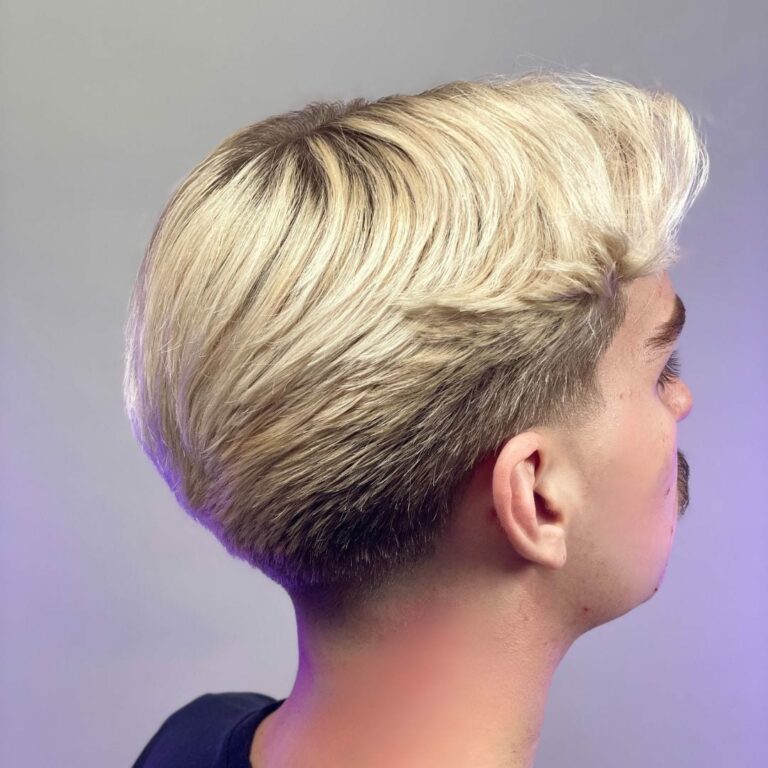
Middle Part
 The result and the process

 What you'll learn
 What you'll learn
How to build a rounded, diagonal gradation as the foundation of a shape.
How to seamlessly connect a longer front panel to the back using a separate triangle.
How to cut the top using the line technique to preserve maximum length at the parting.
How to create a precise taper fade step by step, starting at 6 mm and working down.
Why you should avoid thinning shears and a Chinese razor when lightening your hair.
How to add texture and softness to dry hair using the pointing technique.
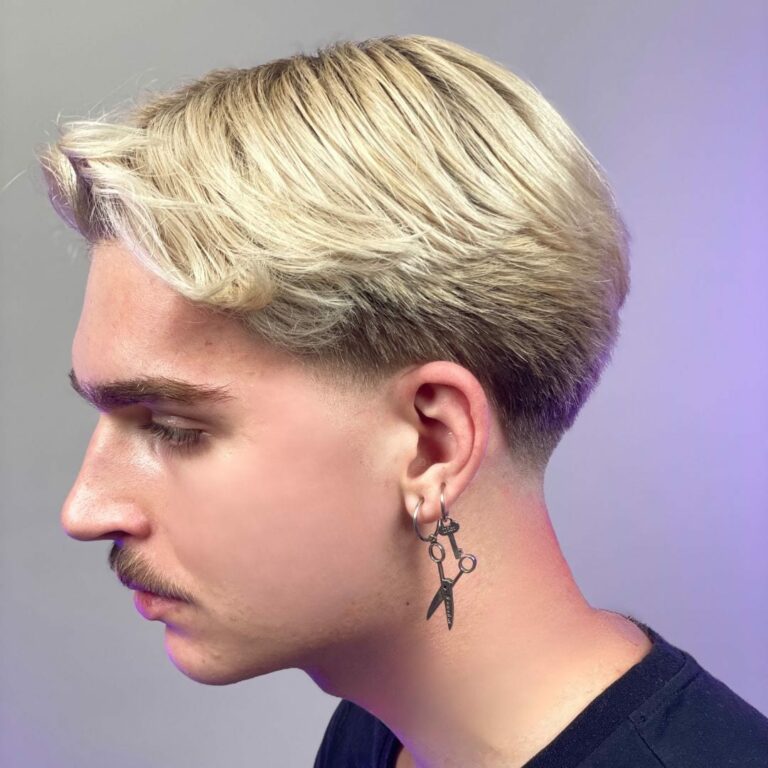
The Middle Part is a modern men’s haircut that combines a soft, voluminous top with a precise taper on the sides and back. This course demonstrates how to create a hairstyle with a natural center part, preserving maximum length and volume on top while establishing a clean, masculine frame using layering and clipper work. This technique is ideal for clients with longer hair, including those with highlighted hair, who are looking for a style with character but without drastically shortening the top.
Vadim Futowsky guides you step by step through the entire process: from analyzing the head and dividing it into sections, through creating a rounded, diagonal layering on the sides, to seamlessly blending the top with the back using a specially designated triangle. You’ll see his signature method for working the top using the line technique—without the classic memory strip—to avoid short hair at the part and create a subtle disconnection at the front that preserves length and natural movement.
In this course, you'll learn:
- A rounded diagonal gradient built from front to back as the foundation for the shape on the sides and back of the head
- A technique for joining the top to the back using a separate triangle at the back of the top of the head, which ensures a smooth silhouette
- A layered cut using a line technique that creates a disconnected look at the front while maintaining maximum length at the parting
- The complete process of creating a taper from 6 mm down, with a smooth transition achieved using a clipless trimmer and a shaver
- Use clips at the roots of your bangs while blow-drying to achieve symmetrical volume and lift effortlessly
- Using the point cut technique on dry hair to reduce volume and soften the transitions without using thinning shears
- A styling look achieved with minimal product (matte paste mixed with water) to show the client the true potential of the cut
After this course, you’ll be able to consciously apply diagonal layering to build shape in longer hair and use disconnection as a deliberate styling technique. You’ll master one of the most popular men’s haircuts by combining precision clipper work at the bottom with texture and movement at the top, giving clients a modern look that’s easy to style every day.
What's inside
Full access to the course
 What's inside

Analysis and haircut plan
"I think Taper will be the best fit for this. It will be the best fit."

Creating a rounded shape at the back
"That's why I'm rounding off the shape in this section."

Key check of the previous band
"It's very important to always check and keep an eye on the previous section so you don't get lost."

When You Shouldn't Cut Your Hair
"If a strand is already the right length and shape, we just leave it as is."

Top-cutting technique with disconnection
"I'm going to comb everything diagonally backward to create a subtle disconnection at the front."

Starting the Taper Fade - from the top
"I'll start from the top down, meaning from six millimeters."

Preserving the natural contour
"When outlining, I try to maintain a natural contour and a natural line."

The philosophy of a smooth transition in tapering
"I want to blend the skin with the hair. That's the most important thing to me—creating a seamless transition."
 Frequently Asked Questions