
Mullet Side Part
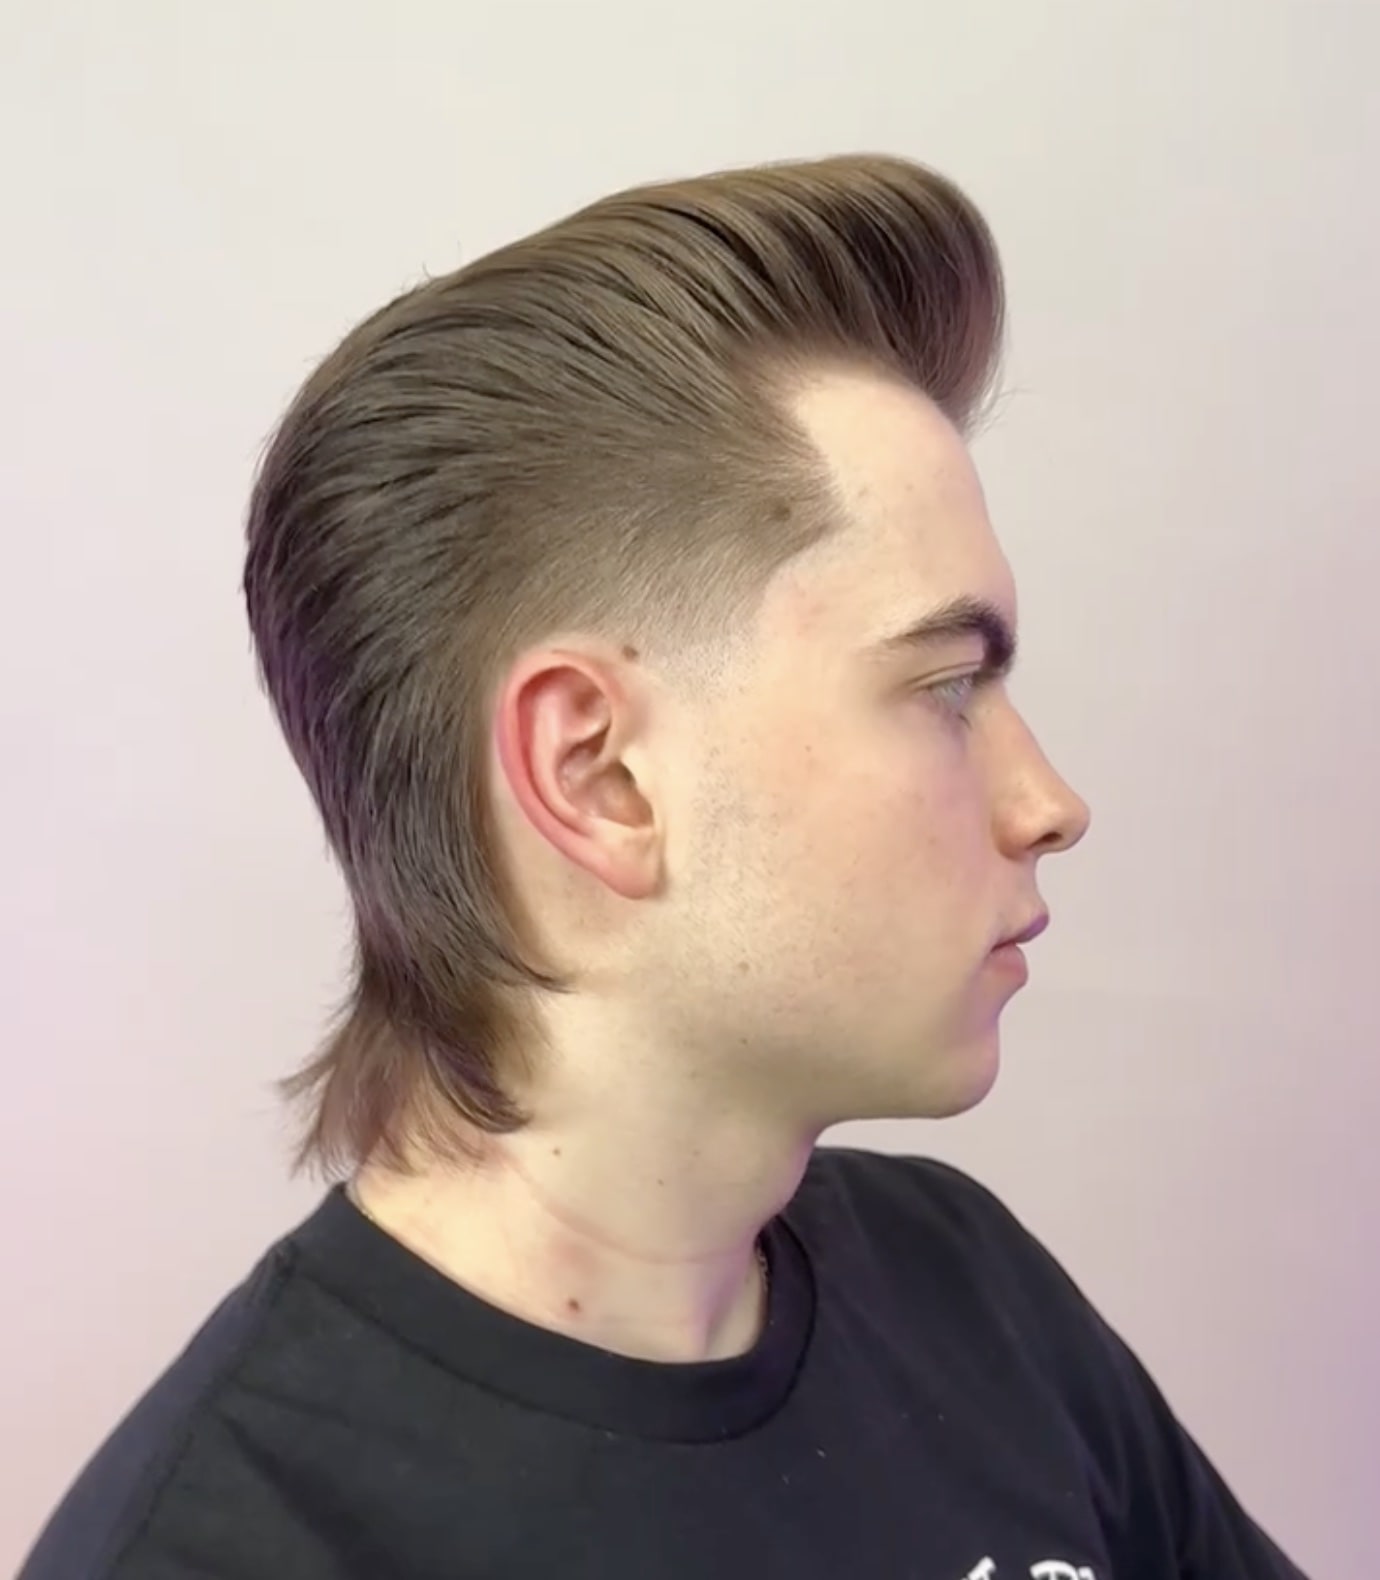
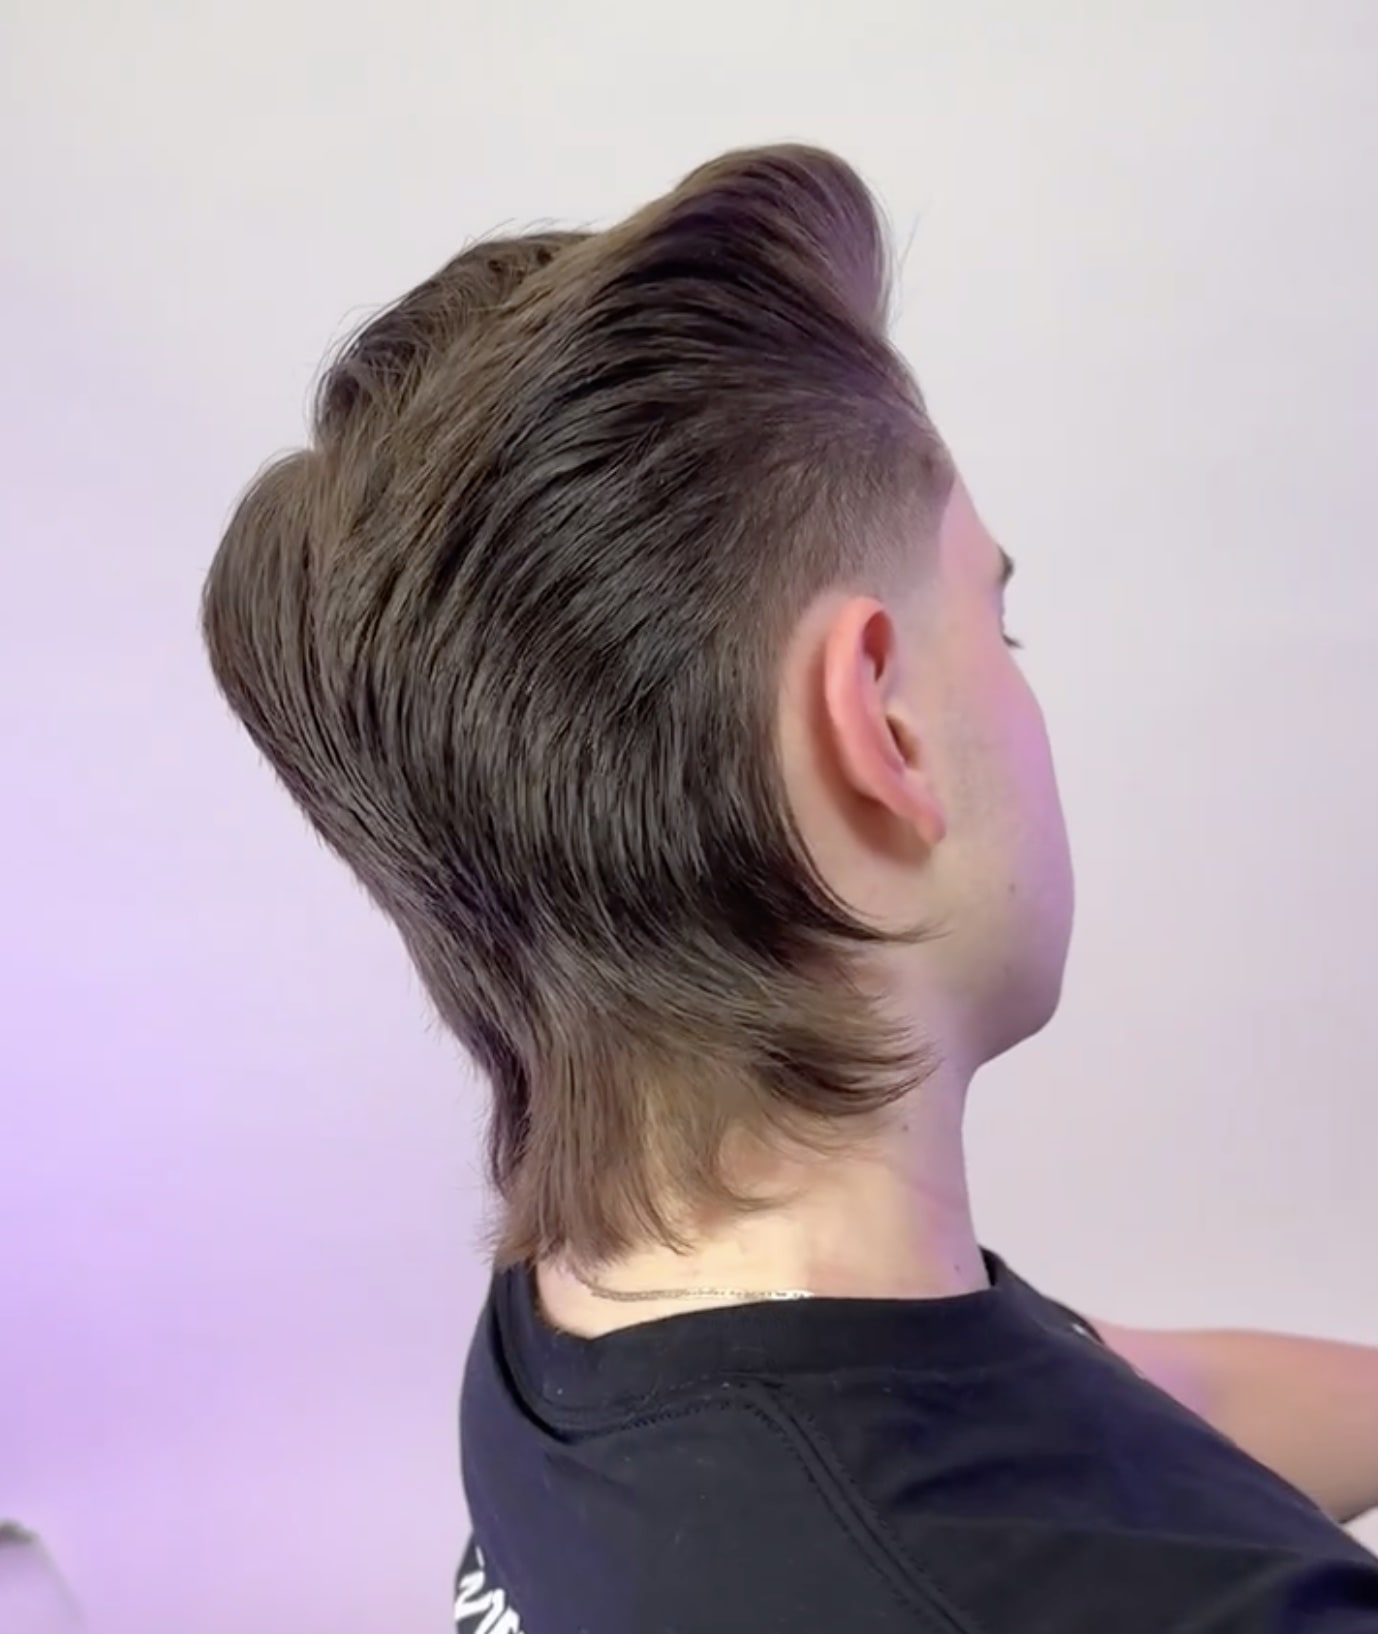
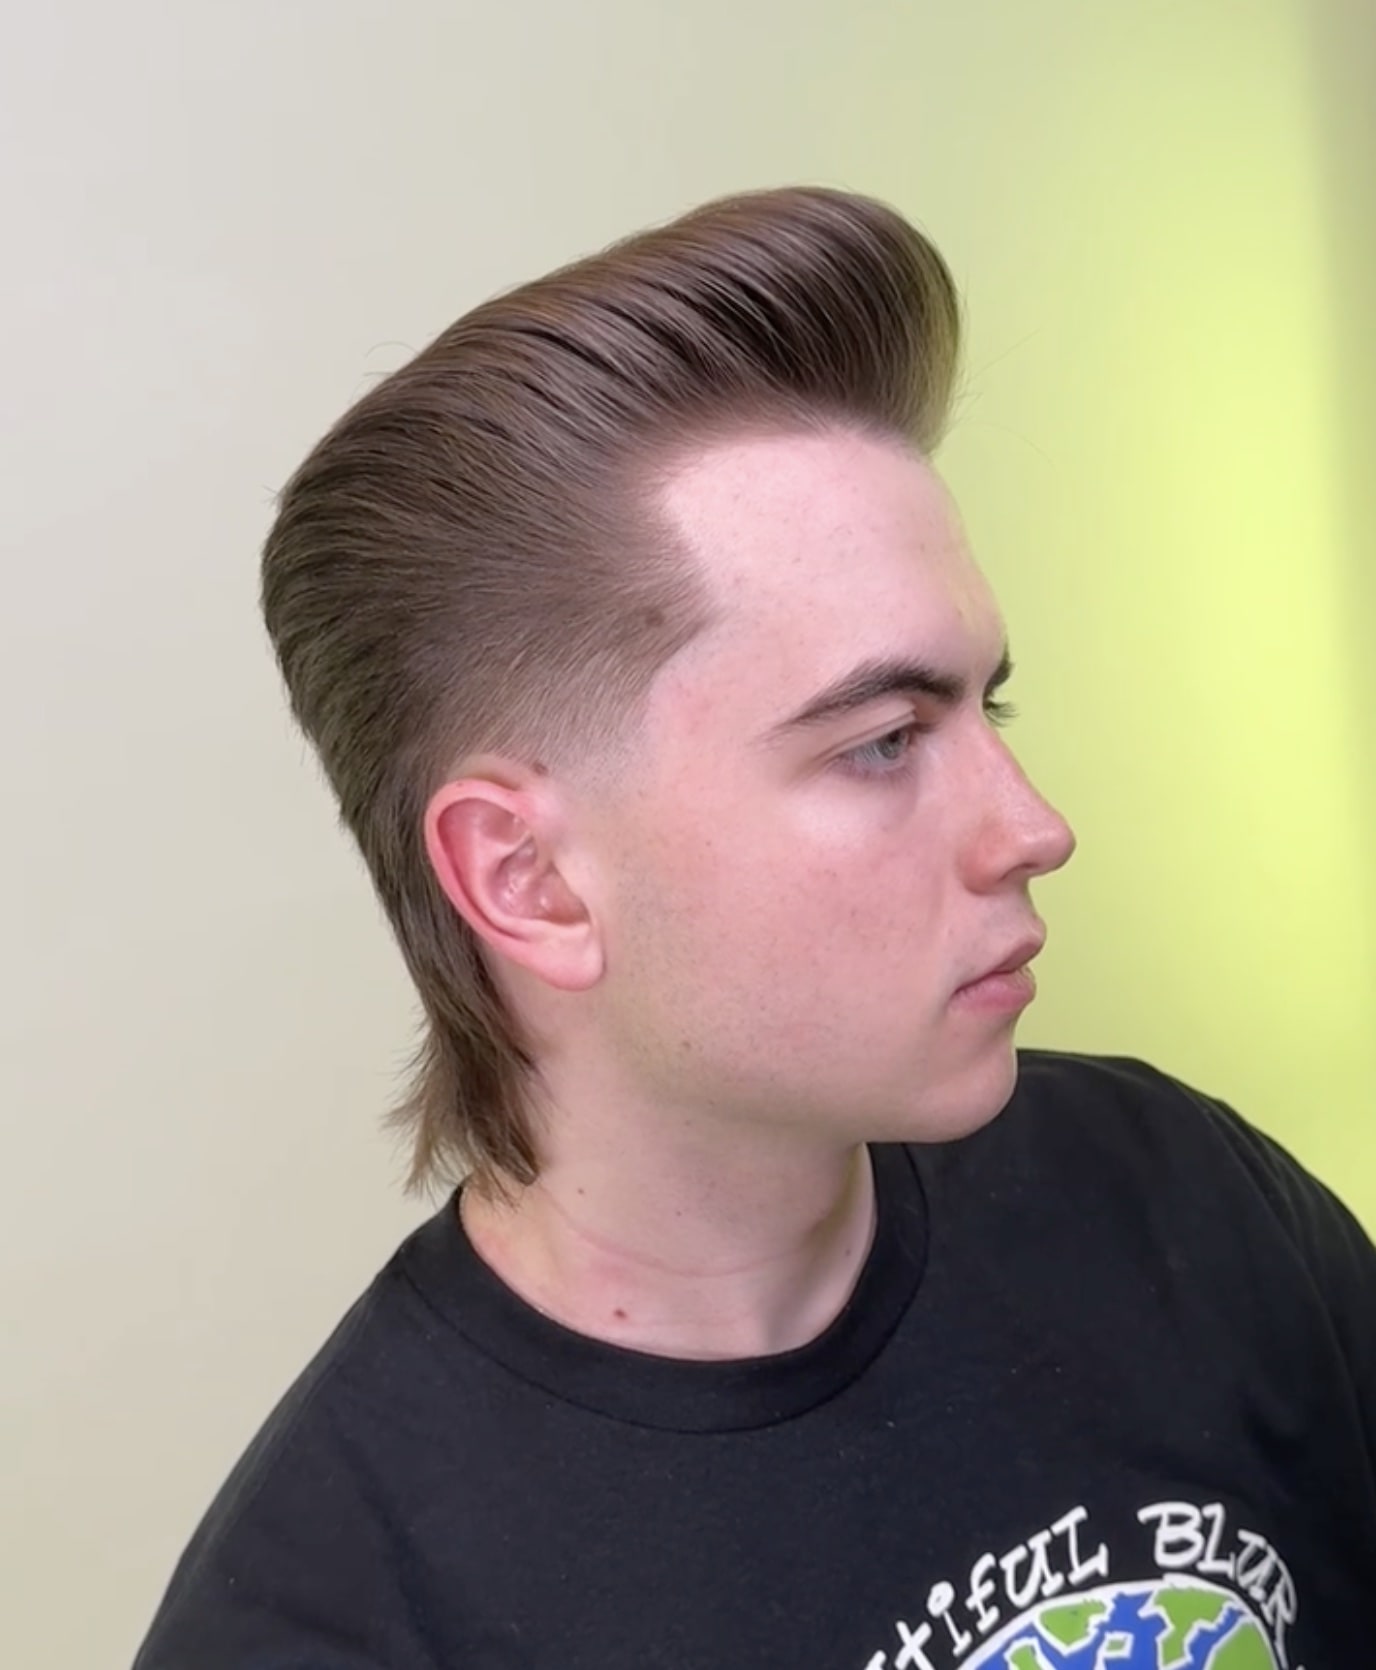
Mullet Side Part haircut course, combining a taper fade with length at the nape. You'll learn to build a contrasting, technical, and fully wearable shape-even on dense hair.
Result and process
About the course
Mullet Side Part is a modern interpretation of the classic mullet, combining three seemingly mismatched worlds: preserved length at the nape, a precise taper fade at the temples, and the classic elegance of a side part. The course shows how to master these contrasts and build a hairstyle that is bold, technical, and fully wearable day-to-day-even on dense, hard-to-style hair.
Paweł Pollheimer guides you through the entire process, starting with the fundamental decision about shape-round horizontally and square vertically. Step by step, he shows how to mark out the horseshoe parting from the cowlick, establish the base length with a single stationary guide at the occipital area, and then build the entire form around this one decision. Work on the sides and back relies on redirecting sections into a triangle to intentionally preserve length at the nape, while the top is built into a disciplined, soft square.
In this course, you'll see
- Marking out the horseshoe parting from the cowlick and establishing the stationary guide at the occipital area as the foundation of the entire hairstyle
- The technique of redirecting sections into a triangle to blend the sides with the back without losing the length at the nape characteristic of a mullet
- Building the top into a soft square shape-vertical work with elevation to chest level and intentional softening of the corners
- Intentionally creating disconnection-how to leave a longer, heavier fringe that doesn't blend with the sides, giving the hairstyle character
- The full process of creating a taper fade at the temples: from blending with clippers using guard #4 all the way to blending with guards 3.5, 2.5, and lower
- Working with texturizing shears on dense hair to lighten the form without damaging its structure and shape
- Final styling into a side part using matte paste and a dryer with strong airflow to build volume in the fringe
After this course, you'll approach modern interpretations of the mullet with confidence, turning a trendy but often chaotic look into a precise, repeatable service in your salon. You'll learn to control the contrasts between length, layering, and classic styling, offering clients a hairstyle with character that is also technically flawless.
What you will learn
- 01How to mark out the horseshoe parting and stationary guide as the foundation of the hairstyle.
- 02How to build a square shape on top by working with elevation to chest level.
- 03How to redirect sections into a triangle to intentionally preserve length at the nape.
- 04How to create a precise taper fade and smoothly blend it with the longer form.
- 05How to intentionally create disconnection on the fringe for a heavier front.
- 06How to texturize dense hair with texturizing shears to add lightness to the hairstyle.
Before you start
This course assumes you already have:
What's inside
Full access with the course 0:49
0:4901Finding the cowlick for sectioning
At the very start, we'll want to find the cowlick, which will let us separate the back section from the top.
 4:45
4:4502Creating the stationary guide at the occipital area
And I'll follow this guide at the same height from the back occipital area through the side section.
 6:56
6:5603Determining the taper fade height
We can see where the head starts to round off, and that will be the height I work up to with the clippers.
 13:34
13:3404Building the square shape on top
If I were to pull the shape straight out to chest level, we'd be building a square shape.
 23:01
23:0105Creating a soft square on top
We won't make it strictly and completely square, flat-we'll make more of a soft square.
 34:34
34:3406Working outward to preserve length
From this point, we'll start working outward to create a longer form at the nape.
 53:21
53:2107Softening the top line with texturizing shears
I'll work with texturizing shears, and pulling out sections every centimeter, we'll gently soften this line.
 1:08:50
08Starting the taper fade with guard #4
I'll use guard number four to start, to easily blend the short hair with the longer hair.
FAQ
Does this technique work well on dense hair?
Is this haircut symmetrical, allowing for a change in the parting?
What concept is the shape of this hairstyle based on?
Does the course explain in detail how to do a taper fade?
Is the fringe connected to the rest of the hairstyle?
What tools are needed besides scissors and clippers?
How long is the course?
Details
Educator

Paweł Pollheimer
Educator · 5 courses
Owner of Royal Barbershop in Gdynia, whose education is built on one universal cutting method. In his teaching, he shows that men's hairdressing is simple and logical, placing the main emphasis on technical aspects, cleanliness, and precision of work. He builds all forms based on fundamental geometric shapes-circle, square, and triangle. He draws inspiration from English academies, including Menzpier.
Ready for the next level
Unlock full access to the Connected Hair course library.
Join the Academy