
Mullet
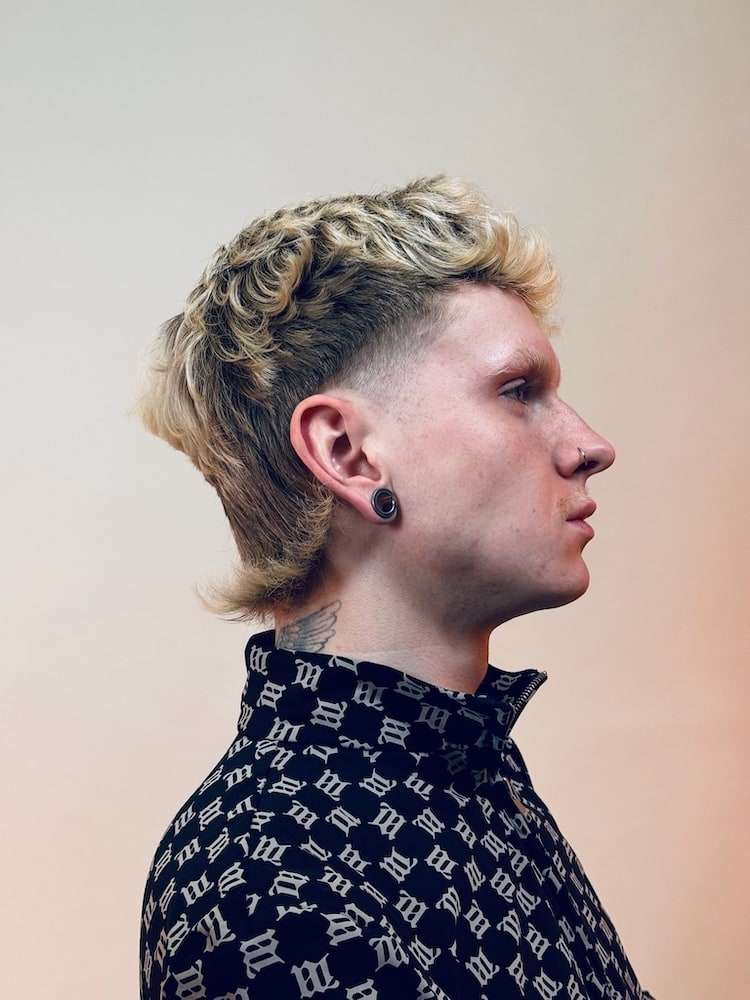
A course on cutting a modern mullet on curly hair. Learn how to precisely plan the geometric shapes of the haircut - a square at the back and a triangle on the sides - before you even start cutting.
Result and process
About the course
Mullet is a modern take on the classic, built on the intentional design of horizontal and vertical shapes. The course shows you how to plan the entire structure of the haircut - from a flat square at the back to a progressive triangle on the sides - before you make the first cut. This technique turns a seemingly chaotic haircut into a thoughtful, geometric composition, ideal for working with a client's naturally curly hair.
Paweł Pollheimer guides you through the entire process, starting with the fundamental horseshoe section and precise geometry planning. You'll see how to first build the outer shape of the haircut by working horizontally, then refine it vertically, section by section. The course covers in detail how to work with elevation using reference points on the body - for example, directing the hair toward the chest to build a perfect square on the sides.
In this course, you'll see
- Planning vertical and horizontal shapes as the foundation of the entire haircut - a square at the back, a triangle on the sides
- Creating a precise horseshoe section from the cowlick to the temples, and the parting that separates the back from the sides
- The full taper fade graduation process: from prepping the plane with a #4 guard to blending down all the way to the zero line
- Selecting and applying two different styling products - matte paste on the back for control, and curl cream on top for texture
- Working with a texturizing razor at a 45-degree angle on the hair ends to add lightness and maximum texture
- Using reference points on the body (e.g., the chest) to control elevation and build the square shape
- Final personalizing of the haircut on dry hair, including a scissor slide-cutting technique on the fringe for a 'messy' effect
After this course, you'll start designing the haircut with intention, based on geometry, instead of just recreating its shape. You'll understand how the flat back and progressive sides work together to create a balanced mullet silhouette. You'll learn to build the taper fade as an integral part of the composition and personalize the whole look on curly hair, giving your client a haircut with character that still looks intentionally styled.
What you will learn
- 01How to plan a haircut based on horizontal and vertical geometric shapes.
- 02How to precisely mark out the horseshoe section from the cowlick to the temples.
- 03How to use reference points on the body to build the shape of the haircut.
- 04How to perform a taper fade, blending from a #4 guard down to zero.
- 05How to choose and apply different products to style each section of the mullet.
- 06How to add texture and lightness to the haircut using a texturizing razor and scissors.
Before you start
This course assumes you already have:
What's inside
Full access with the course 0:30
0:3001Shape concept: triangle and square
I want to create two triangles to build the shape and add more volume around the crown.
 6:28
6:2802Creating the baseline at the nape
I want to shorten this center length by at least a centimeter, so it's shorter than the outer sections.
 8:58
8:5803Blending the progressive side into the back
From the center of the ear, I want to connect this side hair with the back hair.
 13:53
13:5304How body position affects the cut's shape
If I want to create a square shape, I pull the hair more toward the chest.
 24:30
24:3005Vertical personalizing of the back of the haircut
On this section, we'll change the shape and create an inverted triangular shape.
 38:53
38:5306Texturizing the ends with a texturizing razor
I'll hold the razor at forty-five degrees and just work gently on the hair ends.
 56:25
56:2507Preparing the plane for the taper fade
I'll use guard number four for this. I prefer a slightly safer guard and then blend it down afterward.
 1:11:46
08Final softening with freehand clipper work
I'll try to soften it a bit more gently, working freehand with the clippers.
FAQ
Is this course suitable for beginner barbers?
What hair type does this cutting technique work best on?
What sets apart the mullet-cutting technique shown in this course?
Does the course also cover mullet styling, or just the haircut itself?
What specific tools are needed to create this haircut?
Does Paweł explain how to smoothly blend the short sides into the longer back section?
How long is the full video?
Details
Educator

Paweł Pollheimer
Educator · 5 courses
Owner of Royal Barbershop in Gdynia, whose education is built on one universal cutting method. In his teaching, he shows that men's hairdressing is simple and logical, placing the main emphasis on technical aspects, cleanliness, and precision of work. He builds all forms based on fundamental geometric shapes-circle, square, and triangle. He draws inspiration from English academies, including Menzpier.
Ready for the next level
Unlock full access to the Connected Hair course library.
Join the Academy