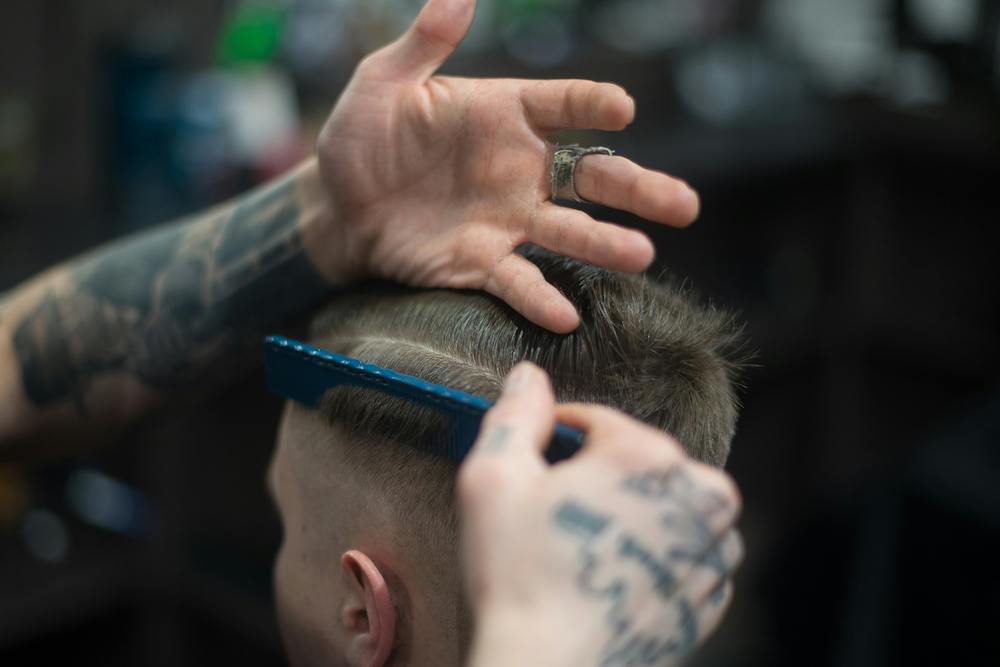
Graduation is what determines whether a haircut looks like it was done by a professional or an amateur. A smooth transition from skin or very short hair to longer hair on top is the foundation of the fade, the taper, and most modern men's haircuts. Below you'll find the concrete craft: guard selection, clipper angles, sectioning, scissor-over-comb blending, and the most common traps that leave transitions looking choppy.
What Graduation Is and Why It Determines the Quality of a Haircut
Graduation is the gradual shortening of hair so that length changes smoothly, without a visible cut line. In practice, this means building multiple adjoining lengths that the eye reads as one smooth transition. This is the principle behind the fade, the taper, and the pompadour, where the sides and back are tapered sharply while the top stays longer for styling.
Graduation works on four things at once:
- it builds smooth transitions between lengths, with no steps or cut lines
- it shapes the head: it defines the crown, narrows the sides, and cleans up the area around the ears and nape
- it removes volume where hair sticks out (temples, above the ears, nape)
- it sets the contrast: the lower and sharper the transition starts, the more striking the haircut
Tools for Graduation
The tool list is short, but each item has a specific job in building the transition:
- Clippers with a full set of guards: the foundation of graduation. A side taper (fade) lever is also useful, letting you fine-tune length smoothly between guard numbers.
- Line-up trimmer: defines the lines at the hairline, temples, nape, and the area around the ear. It works where clippers with a guard are too wide.
- Hairdressing scissors: for the scissor-over-comb technique — softening the upper edge of the fade and blending the sides into the top.
- Thinning shears: reduce volume and break up hard edges without shortening the hair's overall weight.
- Fine-tail comb: for scissor-over-comb work and for lifting the hair at a controlled elevation.
- Clips, a blade-cleaning brush, oil and disinfectant spray, a cutting cape: for sectioning and keeping your tools clean between clients.
A dull blade pulls the hair instead of cutting it and creates uneven transitions. That's why keeping your scissors sharp, along with regularly cleaning and oiling your clipper blade, isn't cosmetic — it's a requirement for a clean fade.
Clipper Graduation Step by Step
The sequence below is a classic fade built from the bottom up. The overriding rule: you work from the shortest guard at the base of the head toward longer ones, breaking up each new edge before moving higher.
Step 1: Preparation and Head Analysis
- Wash and thoroughly dry the hair. Wet hair looks longer and sits differently, so it's easy to take off too much when it's damp.
- Agree on the fade height with the client (low, mid, high) and the length on top. Point on the head to show exactly where the transition will start.
- Assess the hair growth direction, any whorls at the nape, and the shape of the skull. These will decide where you need to work more carefully and at what angle.
Step 2: Sectioning
- Clip off the top section from the areas to be graduated. The top boundary usually runs from temple to temple through the widest point of the head.
- Work zone by zone: back, left side, right side. This lets you see where each length ends and helps you keep things symmetrical.
Step 3: The Guideline — the Shortest Length
- Start with the shortest guard (or a bare blade for a skin fade) at the very bottom, at the nape and above the ears.
- Hold the clippers flat, blade against the scalp, and move with confident strokes against the grain — opposite to the direction of hair growth.
- Close off the bottom with a clean, even baseline all around the head. This is your reference point that every subsequent length will blend down into.
Step 4: Building the Transition (the Actual Graduation)
- Switch to the next, longer guard and place it higher than the previous one, so the two lengths overlap by a few millimeters. Never leave a gap between them.
- At the boundary between two lengths, use the flicking technique: move the clippers upward and, at the moment they leave the hair, flick your wrist to tilt them away from the head. The higher you lift the blade, the softer the transition.
- Where you only want to take off a fraction of length, use the fade lever on the side of the clippers instead of switching the whole guard. This lets you blend in-between lengths.
- Work your way up the head, guard by guard, repeating the overlap-and-flick until you reach the boundary with the top section.
- Keep checking the area from the side and from above, against the light. A band that looks darker or lighter than the rest is an unblended edge that still needs work.
Step 5: Blending and Connecting to the Top
- Soften the upper edge of the fade, where the clippers meet the longer top, using scissor-over-comb. Lift the hair with the comb and cut off the stray ends, working your way gradually lower.
- Break up any hard, harsh edges with thinning shears. Work in small sections, sinking the blades into the hair to soften the line without cutting a bald patch.
- Check the transition by combing through against the grain with your hand: if you feel a step, the two lengths haven't blended together and you need to go back over it with the clippers.
Step 6: Line-Up and Finishing
- Compare both sides at eye level, standing directly in front of the client. Symmetry is easy to lose if you only work from the side.
- Refine the line-up with the trimmer: the hairline, temples, the area around the ear, and the nape. Use the corner of the blade for a clean, sharp edge.
- Style the top the way you agreed, so you can judge the result the way the client will actually wear it day to day.
Types of Fade and How They Differ
The type of fade is determined mainly by the height at which the transition starts and whether it goes all the way down to the skin. You use the same steps — you just change the starting point.
- Taper fade: a subtle transition concentrated around the nape and ears, with the rest of the sides left longer. The most understated, office-friendly version.
- Low fade: the transition starts just above the ears and low at the back. Subtle, and forgiving of beginner mistakes. Our guide to a perfect low fade breaks this down in detail.
- Mid fade: starts roughly halfway up the side, at the temple line. The sweet spot between discretion and impact.
- High fade: the transition starts high, close to the crown area, giving strong contrast between the sides and the top.
- Skin fade: the shortest length goes down to bare skin. It requires shaving with a bare blade at the bottom and very precise blending, since every step shows.
- Scissor fade: the entire transition is built with scissor-over-comb, with no clippers at all. It gives a softer, more natural result and is sometimes the only sensible choice on curly hair.
The Most Common Graduation Mistakes and How to Avoid Them
- A step instead of a transition: this happens when a gap is left between two lengths. Always overlap the next guard with the previous one and break up the edge with the flicking technique.
- Uneven sides: the result of working only from the profile. Every few strokes, stand directly in front of the client and compare the transition height on both sides.
- A poorly set fade height: starting too high with a low hairline visually shrinks the head. Plan the top and bottom boundaries before the first stroke.
- Working against the whorls: hair at the nape and crown grows in a circular pattern. Running the clippers blindly leaves gaps there, so match your angle to the growth direction.
- A dull or dirty blade: it pulls the hair and leaves streaks. Clean, oil, and sharpen your tools before blaming the technique.
Graduation and Hair Type
The same guard gives a different result depending on hair texture. You adapt your approach to how the hair sits and how it responds to tension.
- Straight hair: shows every edge as if drawn with a ruler. Standard clipper graduation works, but it demands exceptionally precise blending, since nothing will hide a step.
- Curly hair: springs back after cutting and shrinks further once dry, so it's better to cut it dry and reach for scissors more often than the clippers alone. Our guide to cutting men's curly hair covers the full approach.
- Fine hair: the scalp shows through quickly, so avoid aggressive removal and use thinning shears carefully to avoid creating bald-looking patches.
- Thick hair: holds a lot of volume and sticks out strongly. Here, thinning shears and carefully removing weight on the sides make the biggest difference.
How to Practice Graduation
- Training mannequin heads: before you work on a client, practice the entire fade from bottom to top on a mannequin. Synthetic hair lets you learn the overlap and the flick without the pressure.
- The flicking movement itself: practice the wrist tilt with the clippers switched off until the motion becomes automatic. It's what determines how soft the transition is.
- Fast guard changes: train yourself to attach and remove guards confidently, so you don't lose rhythm or lose track of the zone you finished on.
- Scissor-over-comb: practice blending with just scissors and a comb separately. This skill saves transitions that clippers alone can't close.
- Studying other people's work: watch good fades and break them down: where the transition starts, how high it reaches, how it blends into the top.
Tool Care
Well-maintained tools cut cleanly and predictably, and that's half the battle with graduation.
- After every client, brush any hair clippings off the clipper blade.
- Regularly apply a drop of oil to the blade so it runs smoothly and doesn't overheat.
- Disinfect all tools between clients.
- Send your scissors and thinning shears for sharpening before they start pulling the hair.
- Store your tools in a dry place, separated from each other, so the blades don't get nicked.
Current Trends in Graduation
- Textured fade: sharp sides paired with a broken-up, textured top for a looser, more casual result.
- Patterns and lines: adding trimmer-cut designs and graphics into the fade zone for an individual touch.
- Colored fade: combining the length transition with coloring. We round up the directions on this topic in our article on men's hair coloring trends.
- Soft transitions: a return to more natural, lower-contrast fades with a gentle upper edge.
Where to Start
A clean fade is the sum of small details: a well-planned transition height, overlap between guards, a controlled wrist flick, and precise scissor-over-comb blending. Read every head individually, since hair growth direction and skull shape change the starting point and the clipper angle. Practice first on training mannequin heads, and after every client, check the transition against the light and look for steps before they become your signature.
If you want to expand your craft with advanced graduation techniques and men's haircuts, check out our online hairdressing courses. You'll find courses there that break the fade down to its fundamentals and show the work step by step on real models.
See it in practice: in the radial pivot graduation course with Piotr Adaszkiewicz, you'll follow the entire process step by step on a model, with commentary from the instructor.


