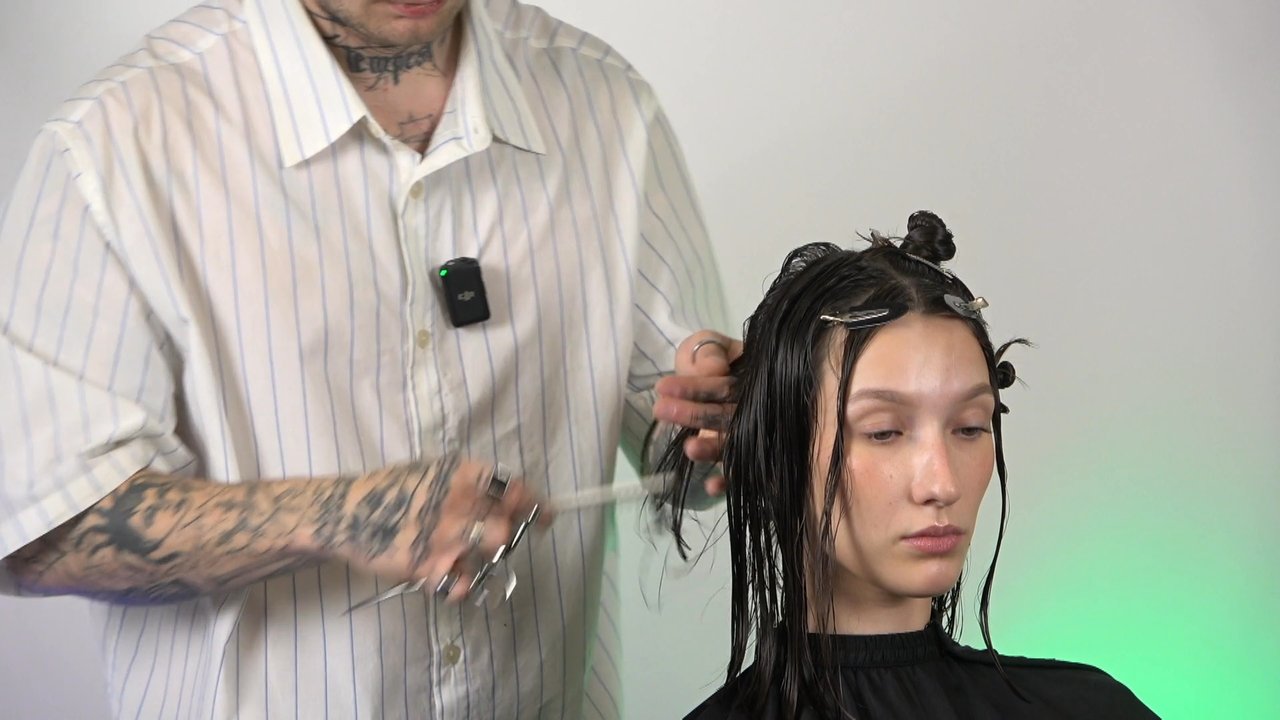
After years of lightening, the model said enough to all-over blonde. Instead, Adam Sierocki boosted the light only underneath and at the front, with the color growing softer and softer the higher up the head you go. That's how Air Touch works: it doesn't color the whole head, it builds light exactly where it needs to catch the most.
Air Touch is a coloring technique where a stream of air from the dryer blows the shortest, finest hairs out of a held section, so lightener only reaches the longer part that stays between your fingers. This way, only selected lengths get lightened, while the shorter hairs near the root stay dark and create natural shadow. The result is a soft transition from a darker top to light ends, with no sharp regrowth line.
How Air Touch differs from classic lightening and balayage
Air Touch differs from regular lightening in that it doesn't apply product to the whole strand — instead, it first blows out the shorter hairs with air and lightens only the length. With all-over lightening, product goes right down to the root across the whole head, so after a few weeks a clear regrowth line appears. Here the root stays darker and the color starts deeper, so the style grows out much more gently.
It's also something different from balayage. While hand-picking strands, Adam Sierocki makes it clear that this isn't about perfectly selecting individual sections: “This isn't balayage.” Air Touch works with whole sections and controls how much hair gets blown out with air, rather than precisely painting selected strands with a brush. A close relative of this method is free-hand lightening, used to finish off the bottom of the style — more on that shortly.
It's a very rewarding coloring technique, because there won't be a regrowth line after a month, two, or three.
Adam Sierocki
Who is Air Touch coloring for
Air Touch works well for people who want lightening with minimal regrowth and are ready to let go of a strong, all-over blonde. It's a solution for someone who's been lightening for a long time and no longer wants to color the root, as well as for people who are wary of coloring and just want “something to happen.” Adam Sierocki stresses that everything starts with a consultation: you can keep Air Touch across the whole head for a subtle effect, or, as with this model, build strong light underneath and around the face.
In terms of hair, the technique is flexible. The model had natural hair, a level eight at the root, lighter along the lengths, unlightened for two and a half years, which gave very good working comfort. That said, you'll sometimes come across hair that's the same length from root to tip, where “you couldn't really blow anything out normally,” so the thickness of the sections blown out and the amount of hair removed need to be adjusted individually. A more pronounced front — the so-called front blond — adds light around the face, while a darker top holds the depth, so the arrangement of light can be tailored to the effect you want to achieve. Working comfort also depends on the condition of the hair, so it's worth taking care of its health — a topic covered in a separate piece on trichology in practice.
How Air Touch is done step by step
Air Touch starts with precise sectioning of the head, which acts as the colorist's map for the whole color service. Adam Sierocki divides the head with an ear-to-ear parting, separating out the back, two sides, and front, then breaks these down further into smaller triangles and sections. This sectioning determines how the color will be distributed and where the light will be strongest.
See how Adam Sierocki explains why everything starts with sectioning:
Without a clear map on the head, it's easy to lose the logic of the lightening, especially when two hairdressers plus an assistant are working behind the chair. Here's how the technique continues:
- The isolated section needs to be combed through very thoroughly right from the root, because badly combed hair won't blow out properly.
- Hold the section close to the root and use the dryer's airflow to blow out the shortest, finest hairs, which fall down out of the section.
- What's left in your fingers gets placed on a foil board and painted with lightener starting from the middle of the section, through the ends, only reaching closer to the root afterward, without excess product.
- Close the foil, press the edges down, and move on to the next section, making sure the layers aren't too thick.
There's a benchmark for section thickness: the layer should be reasonably see-through, so you can see your hand held underneath it. If the section completely blocks the view, it's definitely too thick. Turn the dryer on only once your hand is already on the hair, and the motion should be a light sweeping one, not chaotic — you're not drying the hair, you're dusting out the shortest strands.
Strong front blond and the transition upward
The strength of the blonde depends on how far from the root you hold the section while blowing it out. For the first four foils in each section, Adam Sierocki holds them very close to the scalp and blows out minimally, sometimes applying lightener in a panel to get the strongest reflection of light underneath. Each subsequent section is held further away, closer to the ends, so more dark hair blows out and the color gradually becomes more diffused and natural. He treats the fringe as a front blond, with more strongly defined light around the face.
Blending the darker top
The top of the head is deliberately left darker so it covers the light underneath and creates deep shadow. Here, Adam Sierocki switches systems: he sections off thick, horizontal panels and first hand-picks strands with a hook, only blowing them out afterward, to lighten just the bottom edges and not the root.
See what this change in technique looks like at the top of the color service:
The key is for the lightener at the top to be very well worked in and blended, without a thick “splat,” otherwise a sharp color break appears during lightening. Adam Sierocki refines the transition further at the basin, rubbing the boundary between dark and light hair with gloved fingers, sometimes for three or four minutes, until you can no longer tell where the hair starts getting lighter. He lightens the hair hanging down between sections free-hand, combing it with a plastic-toothed brush soaked in lightener, without foil.
Styling that boosts the color
After washing, toning, and drying, the color shows best with a light wave from a large-barrel curling iron. Adam Sierocki tones the hair using Goldwell level ten in a 50/50 mix of 10BS and 10BG, then creates a beachy look. It's not about a tight, communion-style curl, but a loose wave that makes the color reflect light in a completely different way.
See why wavy hair works better on camera than straight hair:
The styling is easy to repeat at home: a bit of powder at the root for volume, curling sections alternately back and inward, heat protection, and finally combing through with a wide comb from mid-length downward and flicking the hair back for airiness. The whole philosophy: styling should accentuate the color, not cover it up.
How long Air Touch lasts and how to refresh it
Air Touch looks good for a very long time, because it doesn't create a regrowth line, so you can comfortably repeat the color service even a year later. Adam Sierocki shows the trace of an earlier Air Touch on the model's hair, applied quite a while ago, and the hair still looks great because there's no telling where the color ended. Between full color services, it's worth refreshing just the toner, for example after three months, and you can play around with shades: sometimes pure blonde, sometimes powder pink.
If you're blowing out too much hair with Air Touch and missing that strong blonde underneath, or losing the soft transition at the top, it comes down to how far you hold the section and how you blend. Adam Sierocki walks through the entire color service step by step in the Air Touch course: how to create sectioning as a color map, blow out and lighten layers with progression from underneath toward the top, hand-pick and blend the darker crown, and finish the effect with toning and a curling-iron wave.