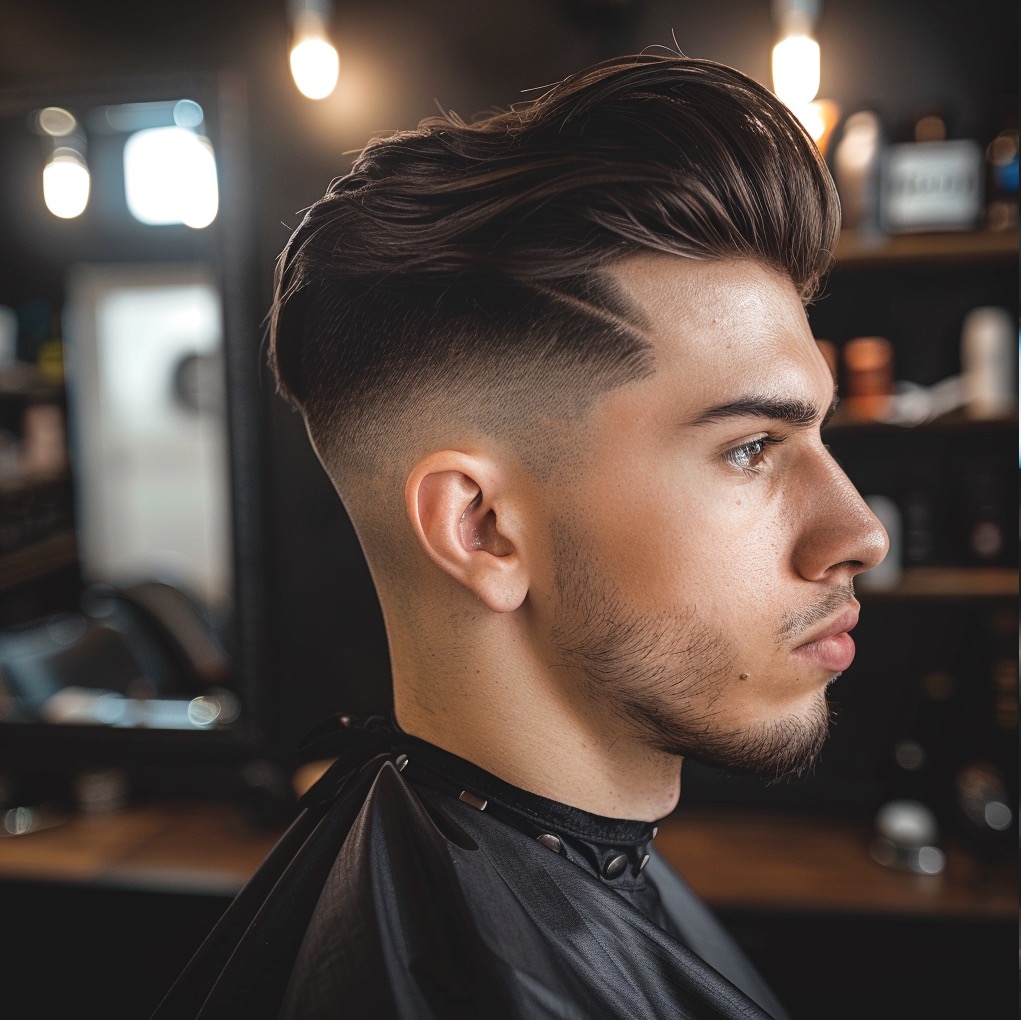
The disconnected undercut is a haircut built on one principle: there's no transition between the short sides and the long top. The absence of a blending line of graduation is intentional, which means the entire difficulty of this haircut comes down to two things: a clean, even disconnection line and the proportion of top to sides. Below is a practical breakdown of the work: sectioning, clipper guidance, guard selection, scissor finishing, and personalizing the cut for the client.
What is a disconnected undercut?
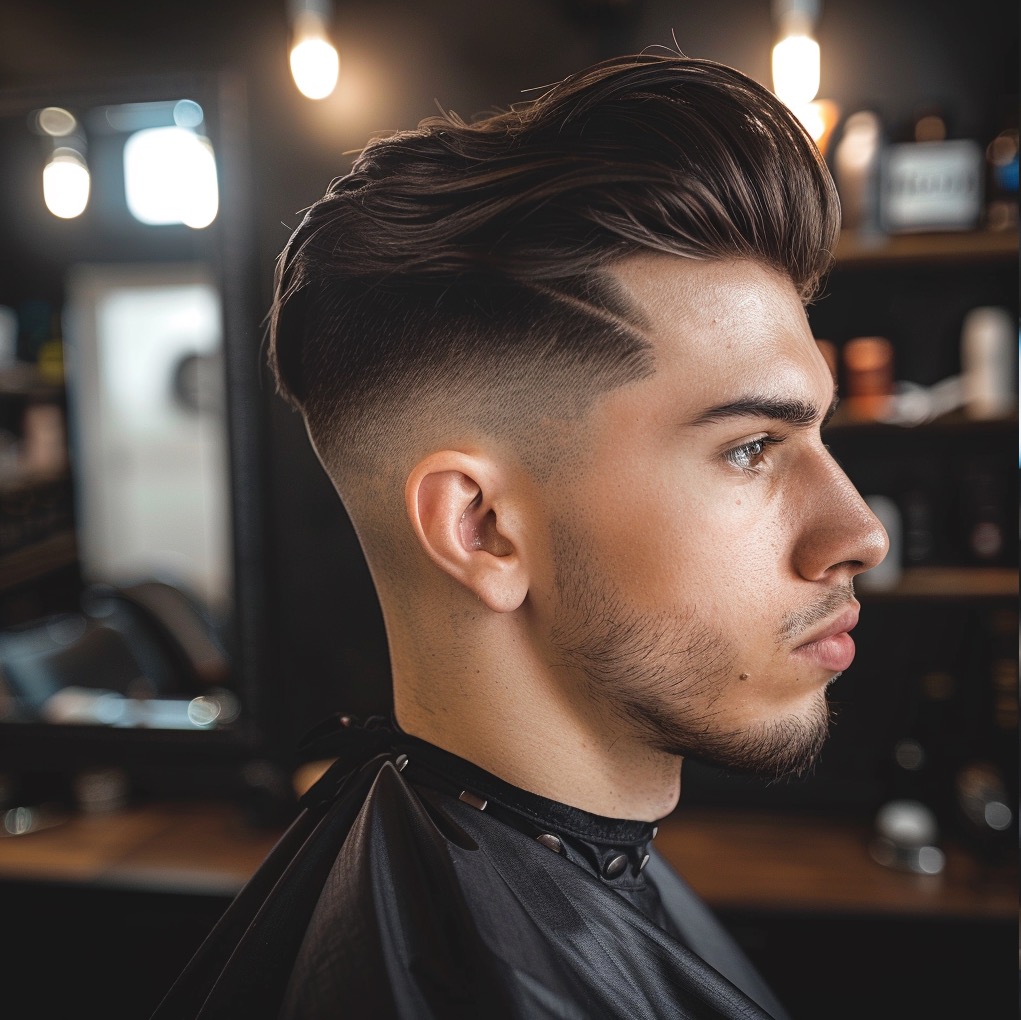
The disconnected undercut is characterized by a sharp contrast between short sides and back and significantly longer hair on top. Unlike the classic undercut, this haircut has no smooth transition between lengths, hence the name "disconnected." The border between the sections is sharp and visible—it's what defines the haircut.
From a technical standpoint, this means two independent length zones meeting at a single, hard line. Where you'd blend a transition in a fade or classic undercut, here you deliberately skip it. That's why mistakes are more visible: any unevenness in the line, asymmetry between the two sides of the head, or a top that's too thin stands out immediately.
History and evolution
Although the disconnected undercut may seem like a modern haircut, it has roots in early 20th-century styles. Originally popular among laborers and soldiers for its practicality, it evolved over time into a stylish urban haircut. In the 2010s it experienced a resurgence, becoming a symbol of hipster culture before entering the mainstream of men's fashion.
The modern version draws inspiration from various subcultures and styles, blending elements of punk rock, classic elegance, and modern minimalism. This versatility makes the haircut appealing to a broad range of clients—from young professionals to artists and content creators.
Preparation and consultation
Cut the disconnected undercut on washed and dried hair. Wet hair "lays flat" and looks longer than it actually is, so you always determine the top length and the height of the disconnection line on dry, naturally styled hair. Keep a water spray on hand for re-wetting during the cut, but length decisions are made dry.
During the consultation, establish three parameters that determine the result:
- Height of the disconnection line—where the short sides end and the long top begins. Standard practice is to run it along the temple bone line or slightly below the widest point of the head.
- Side length—from skin (#0.5) to #2, roughly 1.5 to 6 mm.
- Top length and styling direction—backward, to the side, or forward. This determines how you leave the texture and where you run the part.
Tools
To perform a disconnected undercut you need:
- Clippers with a full set of guards (mainly #0.5 to #2)
- Scissors (for the top)
- A trimmer for line-ups and the disconnection line
- A comb (for lifting sections on top and checking length)
- Sectioning clips
- Water spray for re-wetting
Sharpened, clean clipper and trimmer blades are essential here—a dull blade tugs at the hair and won't give you a clean disconnection line. Remember to follow proper barbering tool care for the best results.
Disconnected undercut step by step
Step 1: Sectioning
- Using the end of the comb, mark a parting line running around the head, from the temple through the side to the back, at the established disconnection height. Keep it at the same height on both sides—it's best to reference fixed points, such as the top edge of the ear.
- Comb the upper, longer section up and secure it with clips so the sides and back are fully exposed and nothing falls into the clipper zone.
Step 2: Cutting the sides and back
- Choose a guard according to the plan (typically #1 or #2 for the classic version, shorter for stronger contrast).
- Guide the clippers against the grain, working from bottom to top in flat, overlapping passes. Each pass should overlap the previous one so you don't leave uncut lines.
- Stop the clipper's movement at the marked parting line and don't let the blade cross into the pinned-up top.
- Work systematically: right side, back, left side, then check the whole area, also running the clippers across (cross-checking) to catch and collect any stray longer hairs.
- If the client wants a softer base instead of a single length, use layering techniques on the lower part of the sides—but remember the top still remains disconnected from the rest.
Step 3: Creating a sharp disconnection line
This is the heart of the disconnected undercut. The disconnection line is the hard border between the short and long sections, and it's what stays visible when the client styles the hair back.
- Release the bottom edge of the pinned-up top just enough to see where the border should run.
- Using a trimmer (without a guard), run it along the line, following the natural fall of the top. Hold the blade at a constant angle, perpendicular to the head, so the line stays sharp rather than ragged.
- Check symmetry from the front, looking straight at the client and comparing the line's height above both ears. It's easiest to check this in a mirror, positioning yourself behind the client.
- Correct with small upward movements—going too low will shorten the top, and you can't undo that.
Step 4: Cutting the top section
- Release the top section from the clips and comb it in its natural growth direction.
- Determine the target top length (typically 5–10 cm) and work section by section. Lift the hair with a comb, maintaining a consistent outer length (hold the section between your fingers at a repeatable angle).
- Move from front to back, each time using the freshly cut part of the previous section as a guide—this keeps the length even across the whole top.
- Finally, check the length by directing the hair toward the target style (backward or to the side), not just straight up.
Step 5: Texturizing the top
- Use point cutting (cutting into the section vertically with the scissor tips) or slicing to break up the hard, blunt edge and add movement. The deeper you go with the scissors, the stronger the texture.
- On thick hair you can lightly remove some volume from underneath the section, but do it carefully so the top doesn't collapse and lose contrast with the short sides.
- Watch the length: the top is the load-bearing element of this haircut, so don't shorten it "in passing" while texturizing.
Step 6: Finishing
- Use a trimmer to refine the line-up around the ears and at the nape. You can leave the nape line natural, round it off, or cut it straight, depending on the client's preference.
- Go over the disconnection line and sides once more, picking up any stray hairs.
- Check symmetry from three angles (front and both profiles) and the line's height above the ears.
Styling the disconnected undercut
Styling reinforces the contrast this haircut is built on. Poor styling can flatten the top and erase the entire effect.
- Blow-dry the hair, lifting it at the root and directing it toward the target style. This is the stage where you build volume that can't be recreated later with product alone.
- Use a texturizing product (paste, clay, matte pomade) for definition and hold. A light matte finish emphasizes texture and section separation.
- Show the client at least one way to style the top—brushed back, to the side, or forward—so they know how to recreate the look at home.
Disconnected undercut variations
| Variation | Description | Best suited for |
|---|---|---|
| Classic | Short sides (0.5–1 cm), long top (7–10 cm) | Most hair types |
| Extreme | Very short sides (0.1–0.3 cm), very long top (10+ cm) | Thick, straight hair |
| With fade | Smooth transition from skin to a short cut on the sides (top remains disconnected) | All hair types |
| With patterns | Adding patterns to the closely cropped sides | Bold clients |
Matching face shape and hair texture
Before cutting, assess face shape and hair texture—these determine the top length and how strong a contrast you can go for.
Face shape
- Round: a longer, lifted top optically elongates the face—a good direction to take.
- Square: soft, textured lines on top will soften sharp jawline features.
- Oval: almost any variation will work well.
- Long: avoid a top that's too long, as it will elongate the face further—go for moderate height and volume at the sides of the top.
Hair texture
- Thin hair: avoid cutting the sides down to the skin, as too strong a contrast will highlight sparse areas. Leave the sides at #1 or #2.
- Thick, straight hair: holds its shape and can handle the strongest contrast—this is where the extreme version looks best.
- Curly hair: consider slightly longer sides for easier styling, and cut the top shorter than you would for straight hair, since the curl will "lift" the length once it dries anyway.
Advanced cutting techniques
Freehand technique
For experienced barbers, the freehand technique adds individual character to the haircut, especially when working on top texture and softening the edges of the disconnection line:
- Instead of guiding the clippers with a guard, use scissors to build texture and movement on top.
- Work without a comb, following the hair's natural fall and cutting whatever actually sticks out.
- This technique demands a high level of precision and a trained eye, but it produces a more organic, natural finish on top.
Combining with other styles
The disconnected undercut is a base you can build various top styles on:
- With a pompadour: short sides combined with a high-lifted, back-swept top. Elegant and striking, it works well for formal occasions.
- With a quiff: a textured, lifted quiff at the front gives a modern, youthful look.
- With a messy top: for a more relaxed look, leave the top longer and style it in a loose, textured way.
Coloring and the disconnected undercut
Color can further emphasize the separation between sections:
- Contrasting colors: coloring the top differently from the sides strengthens the "disconnected" effect.
- Highlights or balayage: subtle lightening on top adds depth and emphasizes texture.
- Color accents: for bold clients, neon or pastel accents on the top section.
You can find more on men's coloring trends in our article on the latest trends in men's hair coloring.
Maintenance and upkeep
The disconnected undercut lives and dies by its sharp line and proportions, and both blur quickly as the sides grow out. That's why client education and visit frequency matter more here than with layered haircuts.
- Visit frequency: recommend visits every 2–3 weeks. After just a few millimeters of regrowth on the sides, the contrast weakens and the haircut loses its impact.
- At-home styling: show the client how to blow-dry the top with volume and which product to use to recreate the salon look.
- Scalp care: in areas cut very short, the scalp can be more visible and prone to dryness, so it's worth mentioning scalp moisturizing.
Version for a professional image
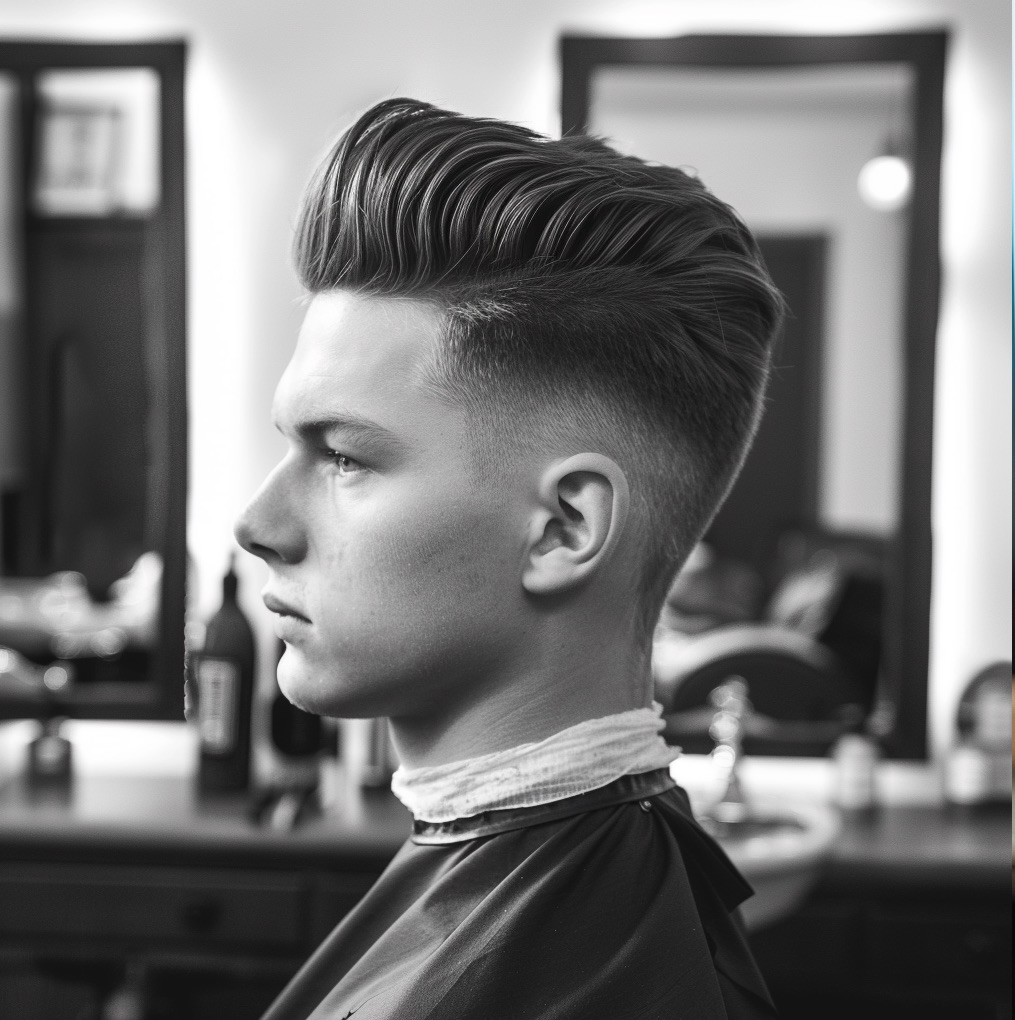
For clients working in more conservative environments, offer a subtler version—the disconnection stays, but it's less bold:
- Less length contrast (sides at #2 instead of skin).
- A less sharp, slightly softened disconnection line.
- Classic top styling, such as a neatly side-combed look.
Portfolio variations
Prepare a set of versions to show clients the range of this haircut:
- Classic disconnected undercut
- Disconnected undercut with fade
- Textured disconnected undercut
- Asymmetric disconnected undercut
- Disconnected undercut with a long top
Common mistakes
- Crooked disconnection line: uneven height on the two sides of the head. Always reference fixed points (the ears) and check symmetry head-on.
- Top cut too short: the contrast disappears and the haircut turns into a plain undercut. Determine length on dry hair, in the direction of the target style.
- Accidentally "connecting" the sections: letting the clippers ride up into the top blurs the border. Pin the top up carefully and don't let the blade go too high.
- Ragged line: the result of a dull blade or an unstable trimmer angle. Work with sharpened tools and hold a constant angle.
Summary
The disconnected undercut comes down to two things: a clean, symmetrical disconnection line and the right proportion of long top to short sides. Everything else you adapt to the client—face shape, hair texture, and where they work. Measure and check every element dry before cutting the final millimeters, because this haircut can't be "fixed" with layering afterward.
To expand your repertoire of men's cutting techniques and work with more confidence on lines, contrast, and texture, consider our online hairdressing courses.


