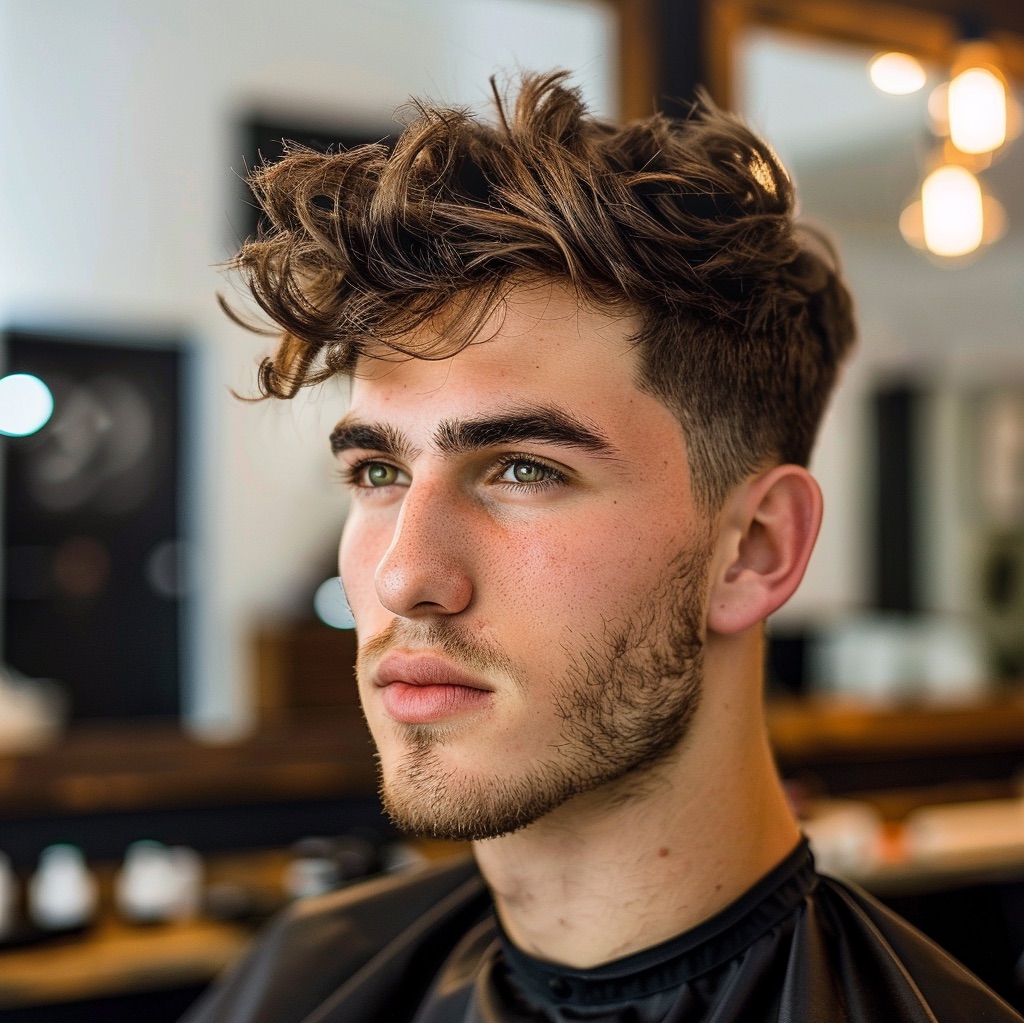
The Textured Crop has stayed a salon staple for several seasons now, for one simple reason: it delivers a strong contrast between short sides and a textured top, while still forgiving clients who rush through their daily styling. For the barber, it's also a haircut that quickly exposes gaps in technique – a poorly blended transition or overly aggressive texturizing shows immediately. Below, I break it down into its core elements: length selection, sectioning, clipper and scissor angles, and finishing, so you get a repeatable result regardless of the client's hair type.
What Is a Textured Crop?
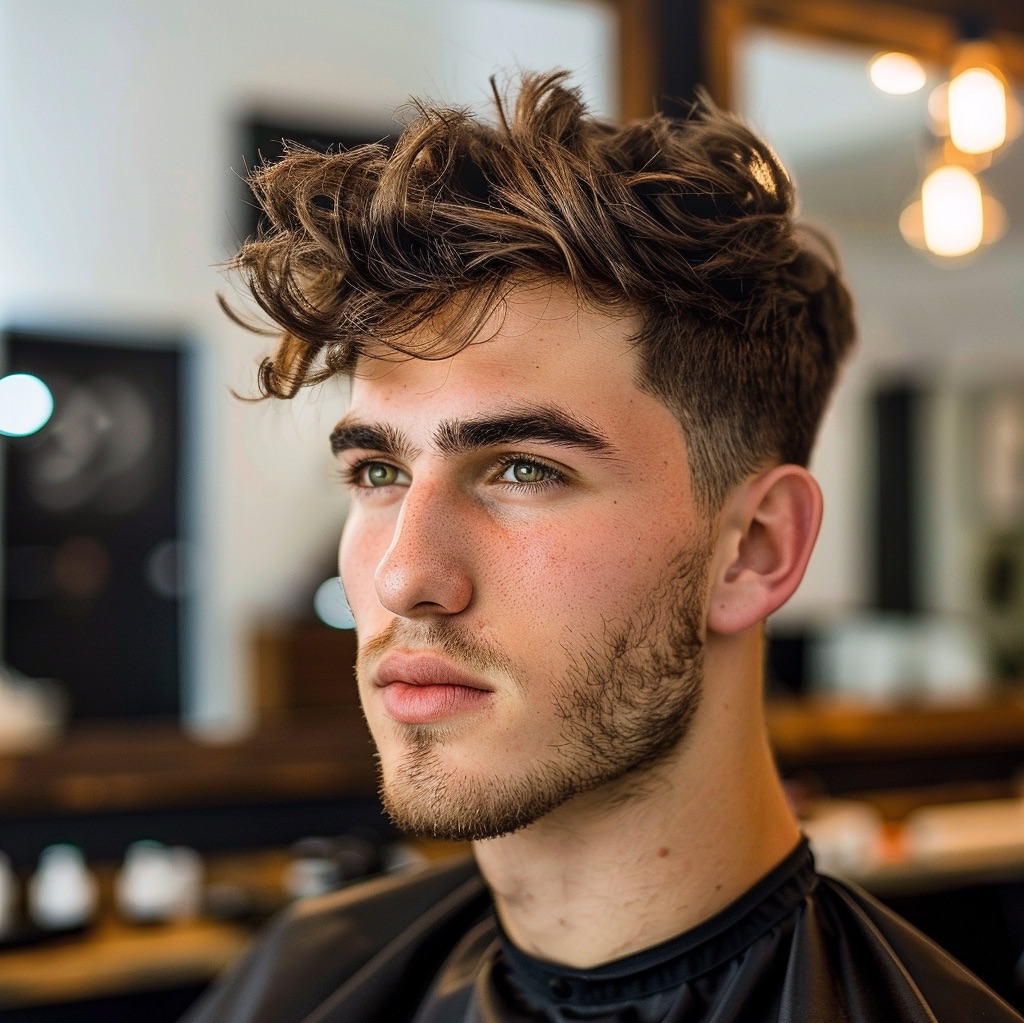
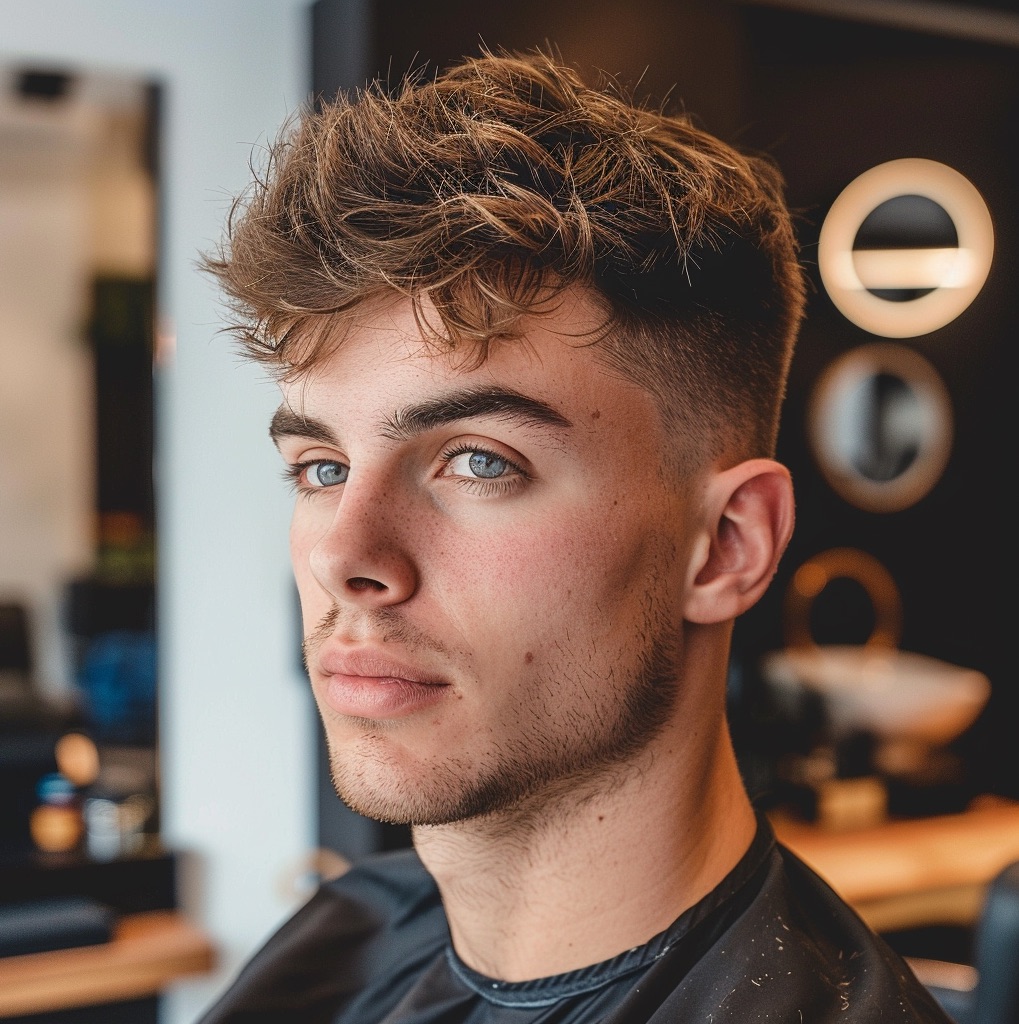
The Textured Crop is a short men's haircut with distinctly shorter sides and back, paired with a longer, deliberately broken-up texture on top. Unlike the classic crop with a smooth, evenly cut top, here the ends are uneven and slightly see-through, giving that signature “messy” movement. The features that define this haircut:
- A clear contrast between short sides and a longer top
- Broken-up, uneven texture on top instead of a uniform, smooth surface
- A seemingly disheveled but controlled look
- Versatility: the same base cut can be worn slicked back wet or textured and broken up dry
The top can have a natural parting or be combed forward into a short fringe, and you can finish off the bottom with any graduation technique you prefer. It's most commonly paired with the popular low fade, but a classic taper works just as well if the client wants the option to comb the sides.
Essential Tools
To create a Textured Crop, you'll need the following tools:
- Clippers with a full set of guards (from the shortest up to roughly a 12mm guard), ideally with a lever for smooth blade adjustment
- Hairdressing scissors for scissor-over-comb work and point cutting
- Thinning shears (ideally single-sided, for reducing density without removing overall length)
- A hairdressing comb (fine teeth for precision, wide teeth for lifting sections) plus a fade comb
- A trimmer for line-ups (around the ears, nape, and optionally the hairline)
- A spray bottle to keep the hair evenly damp
- A blow-dryer, ideally with a concentrator nozzle
- Styling products with a matte finish: paste, clay, or texturizing powder
The texture on top is created with the tips of the scissors, so a dull blade will crease and pull the hair instead of cutting it cleanly, ruining the whole effect. Make sure you keep your hairdressing scissors properly sharp before you sit down to texturize.
Preparing for the Haircut
Half of a successful crop happens before the first cut. Before you pick up the clippers:
- Wash the hair and towel-dry it to a slightly damp state. Cut the top on slightly damp hair, but always check and finalize the texture once it's dry, since wet hair is longer and can throw you off by a few millimeters.
- Discuss specific lengths with the client: which guard for the sides, how high the transition should sit, and how many centimeters you're leaving on top. “A bit shorter” is not a spec.
- Assess the hair's texture and density along with the growth direction, especially at the crown and hairline. This is where you decide how much texturizing the top can actually handle.
- Check the head and face shape: a prominent occipital bone, a receding hairline, any asymmetry. This affects where you'll place the highest point of the top.
- Lay out all your tools within reach and drape the client. Stopping mid-cut to hunt for your thinning shears breaks your rhythm.
Step by Step: How to Create a Textured Crop
Step 1: Cutting the Sides and Back
- Start by setting the transition line: this is what separates the clipper zone from the top. For a classic crop, it typically runs around the widest point of the head – lower for a softer effect, higher for more contrast.
- Choose the shortest length at the bottom (for a taper, an open blade or a #1.5 guard; for a hard fade, the blade set to zero) and cut the sides and back evenly up to the transition line, running the clippers against the grain, opposite to the growth direction.
- Build the graduation with consecutive guards moving up (e.g., #0.5 to #1.5 to #3), working with a “scoop” motion: dig the clippers in at the bottom and lift them away from the scalp as you approach the transition line, so you don't leave a visible ring.
- Depending on the brief, finish off the bottom with a low fade technique for a modern, clean contrast, or a classic taper if the client wants a softer transition.
- Brush the hair off the head and check the sides in the mirror from different angles, ideally under side lighting, since that's what reveals any uneven lines in the graduation.
Step 2: Cutting the Top
- Divide the top into sections with a comb: a central strip from the hairline to the crown, plus side sections on both sides. Working in sections gives you control over the guide length.
- Set the guide length at the back of the head and work your way forward. Lift each subsequent section to roughly a 90-degree elevation from the scalp and cut it to match the length of the previous section, so the top keeps an even base before texturizing.
- Even at this stage, start using point cutting – cutting with the scissor tips pointed into the section rather than a straight, flat cut. This creates a soft, uneven edge instead of a hard line.
- Leave the top longer, typically between 2 and 4 cm. Go shorter for clients with straight, dense hair, and longer when you want more movement or a fringe worn forward.
- Watch out for the crown and the natural growth direction: if the hair stands up there, leave a bit more length, or you'll end up with a gap in that spot once it's dry.
Step 3: Blending the Top with the Sides
- Connect the clipper zone with the top using scissor-over-comb technique. Slide the comb upward from the bottom and cut off whatever sticks out above the teeth, gradually easing the comb away from the scalp.
- Work with a decreasing comb angle: the higher you go, the flatter you hold the comb against the head, so you leave more length and close off the transition softly, with no visible step between the side and the top.
- Check the transition zone on dry hair and from different sides. A smooth blend is the moment the Textured Crop stops looking like two separate haircuts stuck together at the waist.
Step 4: Texturizing the Top
- Move on to the actual texturizing on slightly dried hair. Work in small sections, lifting each strand with your fingers and cutting with point cutting or thinning shears at varying angles, so the ends don't line up into a single line.
- Insert the thinning shears deep into the section, not at the ends, and use them sparingly – one, or at most two, closes per section. Too many cuts close to the scalp will create fluff instead of texture.
- Cut along the natural growth direction, not against it. That way the broken-up texture works with how the hair wants to fall once it's dry anyway.
- Every so often, comb through the top and lift it with your fingers to check how much see-through you're getting. Keep texturizing until the top has movement but still looks full.
Step 5: Finishing and Line-Ups
- Clean up the line-up with the trimmer: around the ears and at the nape, and optionally lightly along the hairline. Hold the trimmer perpendicular to the skin and work with small movements to get a clean, but not overly harsh, edge.
- Check the symmetry of both sides and the overall shape, looking at the head from the front, back, and profile. It's easiest to spot differences by stepping back from the chair.
- Make small adjustments wherever the texture is uneven or the transition has left a shadow. This is the stage for fine-tuning details, not shortening the whole cut.
Texturizing Techniques
Texture is the heart of this haircut, and different techniques create a different character at the edges. It's worth having all of them in your toolkit and choosing based on the hair type and the effect you're going for:
- Point cutting: cutting with the scissor tips pointed into the section, at an angle to the length. Creates uneven, soft ends and is the safest, most controlled method for everyday use.
- Slicing (slithering): sliding slightly open scissors along the section. Removes density along the whole length and helps loosen up a top that's lying too smooth.
- Chipping: small, short cuts deep within the sections. Great for spot-breaking up dense areas that still look clumped after point cutting.
- Razor cutting: using a razor for a very soft, “melted” texture. Gives the lightest effect, but requires a sharp razor and skill. Use it carefully on fine or weakened hair, since it's easy to over-thin.
Adapting the Textured Crop to Different Hair Types
The same base cut behaves differently on different hair, which is why the amount and type of texturizing should be chosen on a case-by-case basis:
- Straight hair: the standard technique works best. Texture is most visible here, so don't overdo the point cutting, since straight hair will show every single cut.
- Curly hair: the curl itself creates texture, so reduce scissor texturizing and focus more on a clean shape and good graduation on the sides. Cut more on dry hair to keep track of the actual length once it dries. More on this in our guide to cutting curly men's hair.
- Fine hair: cut sparingly and avoid thinning shears close to the scalp, since overly aggressive thinning will make the top look even thinner and see-through. It's better to leave a bit more weight and work with point cutting only at the very ends.
- Thick hair: here, thinning shears are your ally. Heavier texturizing and reducing density deep within the sections remove excess volume, so the top lies down instead of puffing up.
Styling the Textured Crop
Even a perfectly cut top will look flat without proper styling. Walk the client through the whole process, since they'll be the one repeating it at home:
- After washing, towel-dry the hair to a slightly damp state, not fully dry. Damp hair takes product better and is easier to shape.
- Take a small amount of texturizing product (paste, clay, or powder) and rub it thoroughly between your palms until it warms up. Product applied in clumps will immediately clump the texture together.
- Work it into the hair from the roots, starting at the back and moving forward, distributing it evenly rather than just on the surface.
- Finish drying with a blow-dryer on a medium setting, shaping the direction with your fingers and lifting the hair from the roots. This kind of dynamic drying gives the top volume and sets the texture.
- Finally, add a touch more product on dry hair, “pulling out” individual strands with your fingers to emphasize the see-through effect and finish off the look.
Stick to matte products. Shine glues the texture into smooth strands and kills the broken-up effect the whole haircut relies on.
Common Mistakes When Cutting a Textured Crop
These slip-ups come up most often and ruin the result the fastest:
- Top cut too short: below two centimeters, there's nothing for the texture to build on, and the haircut loses its character and turns into an ordinary short crop.
- Insufficient texturizing: an evenly cut top lies flat and stiff, without the movement a Textured Crop is supposed to have.
- Too sharp a transition between the sides and the top: a visible step at the waist makes the top and sides look like two unrelated haircuts. Careful scissor-over-comb blending is what saves you here.
- Ignoring the growth direction and the crown: cutting against the growth or too short at the crown ends up with sticking-up sections the client won't be able to tame at home.
- Wrong styling products: shiny pomades and gels glue the texture together. Only matte finishes work for this haircut.
Textured Crop Variations
The base cutting scheme is easy to adapt to different features and client preferences. The most common variations:
- Textured Crop with a fringe (French Crop): a longer top combed forward into a short fringe. Great for disguising a receding hairline and a high hairline.
- Asymmetric Textured Crop: one side of the top noticeably longer, with a more defined parting. Gives a bolder, more fashion-forward look.
- Textured Crop with a high fade: combined with a high fade for maximum contrast and a bolder, more dramatic effect.
- Textured Quiff: a longer top, lifted and swept back with quiff elements, for clients who want more height at the front.
Summary
The Textured Crop comes down to three things: clean graduation on the sides, a well-executed transition, and controlled texture on top. If the base is even and the blend is soft, the texturizing itself becomes a pleasure – and it's what defines the character of the whole look.
Every head is different, so choose the length on top, the amount of thinning, and the height of the transition based on the client's hair type, growth direction, and face shape. The more crops you cut, the more confident you'll feel about how much texturizing a given head of hair can take before it starts to look over-thinned.
If you want to fine-tune your graduation, blending, and thinning shear work, check out our online hairdressing courses. You'll find courses dedicated to modern men's haircuts that break these techniques down into individual moves.


