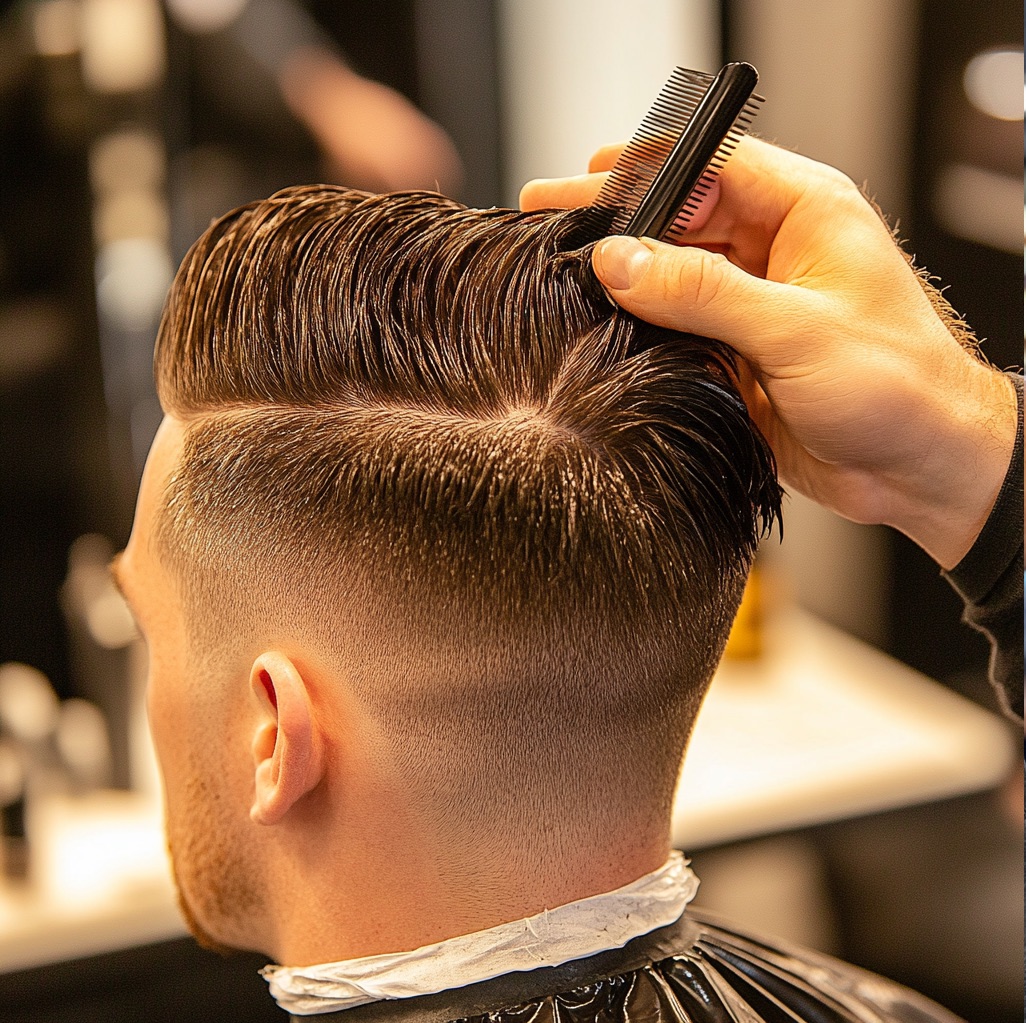
The Faux Hawk is a haircut that delivers a mohawk silhouette without shaving the sides down to the skin. The whole craft lies in building a clearly defined strip of longer hair down the center of the head and blending it with shorter, graduated sides so the transition is seamless and the shape holds even without styling. Below you'll find the full craft: sectioning, clipper angles, blending with scissors and comb, and finishing, plus variations and how to match it to different client types.
What Is a Faux Hawk?
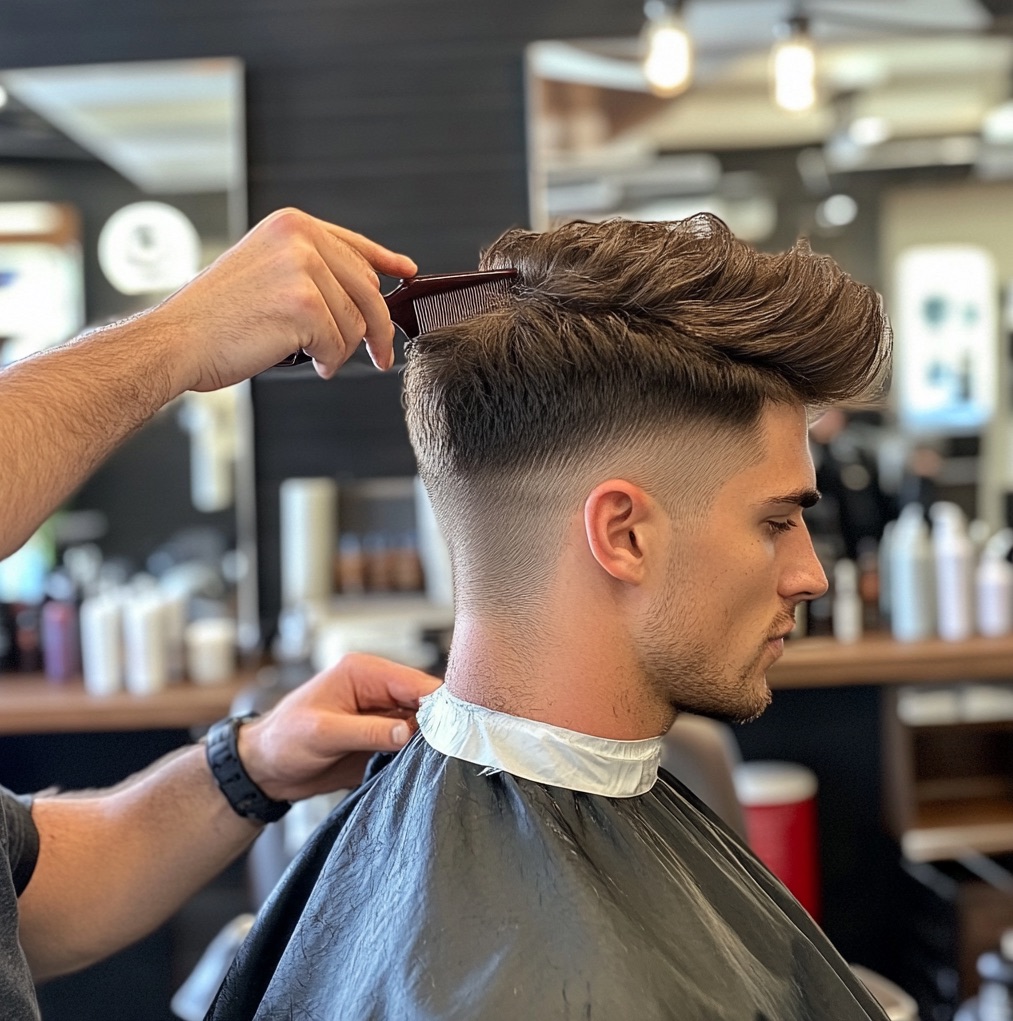
The Faux Hawk, also called the “Fohawk,” is a softened version of the mohawk. The difference is fundamental: in a classic mohawk the sides are shaved down to the skin, while here they're graduated, so the haircut forgives more mistakes and works for everyday wear. The shape is built on a triangular strip of longer hair running from the hairline toward the crown, tapering toward the back, while the temple area and the nape are graduated.
For the barber, this means two distinct work zones with different logic: you work the sides with clippers using the fade technique, while you shape the top with scissors, keeping in mind root volume and how the weight will settle after styling. The hardest part is the connection point (corner), where the short side meets the longer top – this is where it's decided whether the haircut looks intentional or overgrown.
Preparing for the Haircut
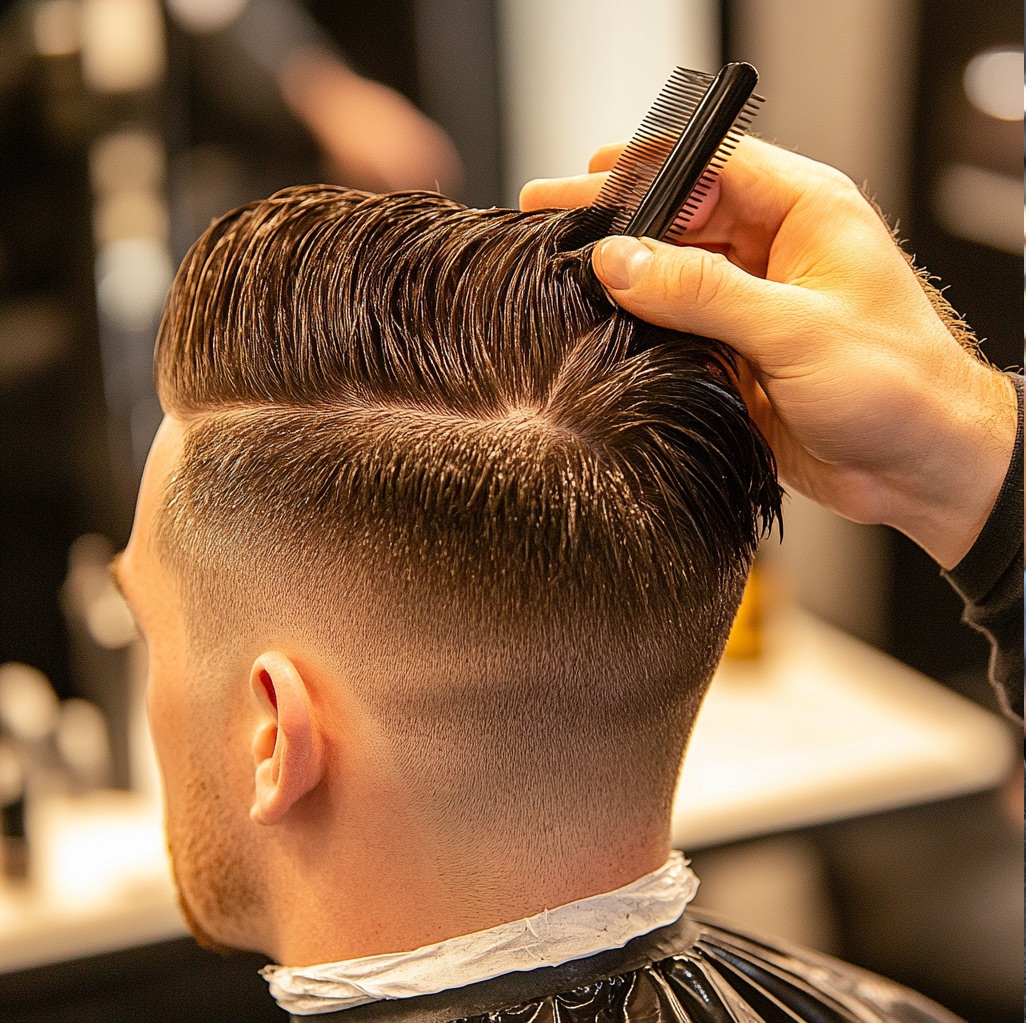
Before you pick up the clippers, establish your starting point. The Faux Hawk lives and dies by the natural hair growth pattern, so the consultation determines how high you'll take the fade and how much weight you'll leave on top.
- Wash and dry the client's hair – assess it in its natural state, without product, to see the real growth direction and strand thickness.
- Check the crown whorls and the hairline pattern at the temples: these determine where the strip will sit naturally on its own and where you'll need to support it with styling.
- Discuss the end result with the client – sharp contrast (high fade) or a gentle transition (taper), the length of the top strip, and whether the hair should stand up firmly or lie down with texture.
- Prepare your tools: clippers with a full set of guards, a trimmer for line-ups, cutting scissors, thinning scissors, a barber comb, and a spray bottle of water.
Step by Step: Creating the Faux Hawk
- Establishing the Section
- Separate the top section of hair, creating a triangular (or narrow rectangular) section running from the hairline to the crown. Clip it up or comb it out of the way so it doesn't interfere with the clipper work area.
- Make the strip widest above the forehead and taper it toward the back – this shape is what builds the “comb” silhouette. Too wide a strip flattens the effect; too narrow gives you a little cockscomb instead of a Faux Hawk.
- Watch your symmetry: the parting on the left and right should start at the same point relative to the hairline. The easiest way to check this is with a comb running from the crown down, laying it along the temple line.
- Cutting the Sides (Fade)
- Set the fade starting line. For an everyday, versatile Faux Hawk, run it at temple height (mid fade); for stronger contrast, take it higher (high fade); for an office-friendly version, go lower and create a taper fade with a smooth transition.
- Leave the shortest length at the bottom (ear line, nape). Guide the clippers from bottom to top, with the blade flat against the head, moving against the direction of hair growth.
- Build the gradient from the shortest guard at the bottom to a longer one at the top, and blend the transitions between lengths using the flicking technique (a wrist flick, “kicking” the clippers away from the skin at the boundary between zones). Any visible horizontal line needs to be blended out.
- Work symmetrically – after each pass on one side, repeat it on the other before moving higher. Every few passes, step back and check both sides from the front, straight on to the face.
- Cutting the Top
- Work on slightly damp hair to establish the shape, and do the final length check on dry hair – wet hair is longer and it's easy to cut it too short.
- Take vertical sections and establish the guide length at the back of the strip, then carry it forward (the travelling guide technique). Usually leave the front hair slightly longer – this is what creates lift and movement at the front of the haircut.
- Hold the sections out at a consistent elevation: 90° elevation from the head gives an even, higher layer, while a smaller angle leaves more weight. For a Faux Hawk, it's helpful to pull sections toward the center of the strip to concentrate volume along the ridge.
- Finish by texturizing the ends with point cutting (cutting vertically into the ends of the section with the tips of the scissors). This breaks up the hard cutting line, adds movement, and keeps the top from looking like a solid block.
- Connecting the Top with the Sides
- Decide on the character of the strip's edge. A disconnect gives a clear, sharp boundary between the long top and the short side; a blended version gives a soft transition, where the longer hair gradually shortens toward the sides.
- For the blended version, work with scissor over comb along the entire edge of the strip: the comb guides the hair, the scissors remove the excess, and the angle of the comb sets the steepness of the transition.
- Pay the most attention to the corners above the temples and above the ear – that's where a visible “step” forms fastest. Angle the comb progressively deeper until the longer section blends smoothly into the fade zone.
- Finishing
- Use the trimmer to refine the line-up: the hairline at the temples, around the ear, and at the nape. Hold the blade perpendicular to the skin and follow through with one confident, continuous line – going over it repeatedly widens and ruins the line-up.
- Check symmetry on dry hair, looking at the client from the front and from both profiles. Compare the fade height and the starting point of the strip on the left and right – the eye picks up unevenness fastest right here.
- Correct any unevenness and blow off or brush away the clippings before moving on to styling.
Graduation and Texturizing Techniques
The quality of a Faux Hawk isn't determined by length alone, but by how cleanly the transitions work and how much movement the top has. Three techniques worth mastering:
- Clipper fade (sides): a gradient built with successive guards, blending the boundaries with a wrist movement. The cleaner you blend the lines, the more premium the result looks, regardless of how high the fade starts.
- Point cutting (top): cutting vertically into the ends of the sections with the tips of the scissors breaks up the hard line and adds texture along the ridge of the strip. It's the essential tool for getting the top to stand up naturally instead of sitting like a flat slab.
- Slicing and thinning: removing excess weight from inside the section (thinning) or sliding the scissors along the section (slicing) lightens thick hair and adds movement. Use sparingly on clients with fine hair – thinning shears can strip away the volume you're trying to keep here.
You can learn more about advanced graduation techniques in our course Shaping Volume and Form in Men's Haircutting.
Styling the Faux Hawk
A good cut makes styling easier, but it's the blow-dry that builds the height of the strip. The direction you work the brush and the roots determines whether the hair stands up or falls to the sides.
- Apply a volumizing product to damp hair (mousse or root spray), distributing it with a comb from the roots.
- Blow-dry the hair with a round brush, lifting it at the root and directing the sections from both sides toward the center of the strip – this movement is what builds the Faux Hawk's ridge. Direct the airflow from the scalp toward the ends.
- Mold the shape with paste or wax. Matte paste gives a natural, textured look; pomade adds shine and holds the sections together more firmly. Apply it to fingers warmed between your palms and work from the ends toward the roots.
- Set it with hairspray from a distance, using a light mist – too much will stiffen the strip and take away its movement.
You'll find detailed styling advice in our article How to Style Men's Hair: Tips for Clients.
Faux Hawk Variations
The base construction stays the same – what changes is the length of the strip, the height of the fade, and the amount of texture. You match these to the client's hair type and lifestyle:
- Long Faux Hawk: a longer strip on top gives a more dramatic silhouette and a higher ridge, but it requires daily styling and works best on thick, not overly fine hair.
- Textured Faux Hawk: a top that's more heavily point cut gives a modern, “tousled” look with plenty of movement – a good match for hair with a natural wave.
- Soft Faux Hawk: a lower fade or taper with less contrast between the sides and top. An office-friendly version, easy to style flat when the client doesn't want to show off the strip.
Tips for Barbers
- Match the fade height and strip length to the face shape and hair type – the same technique gives a different result on straight, wavy, and thick hair.
- Make the disconnect vs. blended decision at the start, not partway through – it determines how you shape the edge of the strip from the very first clipper passes.
- Check symmetry in stages, from the front, straight on to the client's face – not just at the end. The most common mistake is uneven fade height on both sides.
- Don't overdo the thinning shears on top – that's what holds the volume the Faux Hawk needs. Teach the client how to blow-dry the strip toward the center so the haircut works at home too.
Hair Care and Maintenance
The Faux Hawk thrives on contrast, and that contrast fades as the sides grow out. Set realistic maintenance expectations for the client:
- Refresh the fade every 2-3 weeks – after that, the sides grow out, the transition loses its definition, and the shape of the strip blurs.
- Choose products for the hair type: matte paste for texture, pomade for shine and hold, a light spray for volume on fine hair.
- Protect against high heat while blow-drying – overheating the roots weakens the hair and robs it of the spring that holds the strip up.
You'll find more care advice in our complete grooming guide.
History and Evolution of the Faux Hawk
The Faux Hawk grew out of 1970s and '80s punk rock as a tamed version of the mohawk – no shaving the sides to the skin, but graduation instead, which carried the shape from subculture into the salon.
- 1990s: the first softened versions appear in alternative culture.
- Early 2000s: popularized by celebrities, including David Beckham.
- Today: a wide range of variations, from subtle to bold, often paired with a high fade.
For the barber, this evolution has a practical takeaway: the same underlying shape can be shifted from a cautious, office-friendly version to a bold, high-contrast look, depending on the fade height and the length of the strip.
Matching the Faux Hawk to Face Shape
The height of the strip and the starting point of the fade are the simplest levers for correcting facial proportions:
- Round face: a taller strip and a higher fade visually lengthen the face.
- Square face: softer transitions and a less sharp edge on the strip soften strong features.
- Oval face: practically any version will work – this gives you the most freedom in length and height.
- Long face: a lower strip and a lower fade starting point, so you don't lengthen the face even further.
You'll find more on matching haircuts to face shape in our article on men's hairstyles for different face shapes.
Specialized Tools for the Faux Hawk
Beyond the standard kit, it's worth keeping tools on hand that make clean transitions and texture control easier:
- Thinning scissors for lightening a thick top without losing the length of the strip.
- A trimmer with a precision blade for line-ups and clean edging around the ear and at the nape.
- A razor for marking a sharp edge on the strip in the disconnect version (use carefully – it creates a hard, irreversible line).
- A good barber comb – without it you can't do clean scissor over comb work at the connection between the top and sides.
Sharp, well-maintained tools have a real impact on the cleanliness of your transitions – a dull blade tugs at the hair and leaves a ragged cutting line.
Faux Hawk vs. Other Popular Men's Haircuts
The Faux Hawk shares certain traits with other shapes based on top-to-sides contrast. Knowing the differences helps you accurately read what a client really wants when they show you a reference photo:
| Haircut | Similarities | Differences |
|---|---|---|
| Pompadour | Longer hair on top | In a pompadour, the sides are usually longer, and the weight is combed back, not into a strip |
| Undercut | Contrast between top and sides | The Faux Hawk has a distinctive tapering “ridge”; the undercut doesn't require this silhouette |
| Quiff | Lifted hair at the front | The quiff doesn't taper as clearly toward the back and is combed upward, not toward the center |
Color Trends for the Faux Hawk
Color can emphasize the shape of the strip, playing with light and shadow along the ridge and sides:
- Color gradation: darker sides and a lighter top reinforce the contrast the fade is already building.
- Highlights: subtle lightening along the ridge of the strip adds depth and emphasizes the texture.
- Bold colors: platinum blond or neon accents for clients looking for a striking effect.
Before any significant color change, run a color consultation and assess the hair's condition and porosity.
The Faux Hawk in a Professional Context
The same haircut can be “toned down” or “turned up” depending on the environment the client works in. It's worth showing them both extremes:
- Subtle version: a low fade and a shorter strip, easy to style flat – for corporate and formal workplaces.
- Bold version: a high fade, a longer strip, strong texture – for creative industries and less formal environments.
- Versatile version: a cut that can be styled either firmly into the strip or off to the side – one haircut for different occasions.
Show the client how to switch between variations just by changing how they blow-dry and how much product they use, and they'll come back to you more often.
Problems and Solutions
A few issues come up again and again when cutting and maintaining a Faux Hawk. Here's how to defuse them:
- Problem: not enough volume on top.
Solution: leave more weight in the strip (less thinning), blow-dry with a round brush toward the center and at the root, use a volumizing product; for exceptionally fine hair, discuss a perm with the client. - Problem: a transition between the sides and top that's too sharp and “stepped.”
Solution: refine the edge of the strip with scissor over comb, blend the boundary with scissors and thinning shears, and go deeper into the corners above the temples. - Problem: the client struggles to style it at home.
Solution: show them a simple routine (wet hair, blow-dry toward the center, a small amount of paste) and recommend specific products for their hair type.
Summary
The Faux Hawk comes down to three things: a clean fade on the sides, well-built volume in the triangular strip on top, and a seamless connection between these two zones. Master your sectioning, angle control on the fade, and scissor over comb work along the edge of the strip, and you'll be able to adapt everything else – length, fade height, amount of texture – to the client's face and lifestyle. Finish it off with styling that builds the strip, and a quick walkthrough for the client so the haircut works between appointments too.
Want to go deeper into working with form and volume in men's haircutting? Check out our online courses and our blog for more tutorials and inspiration.


