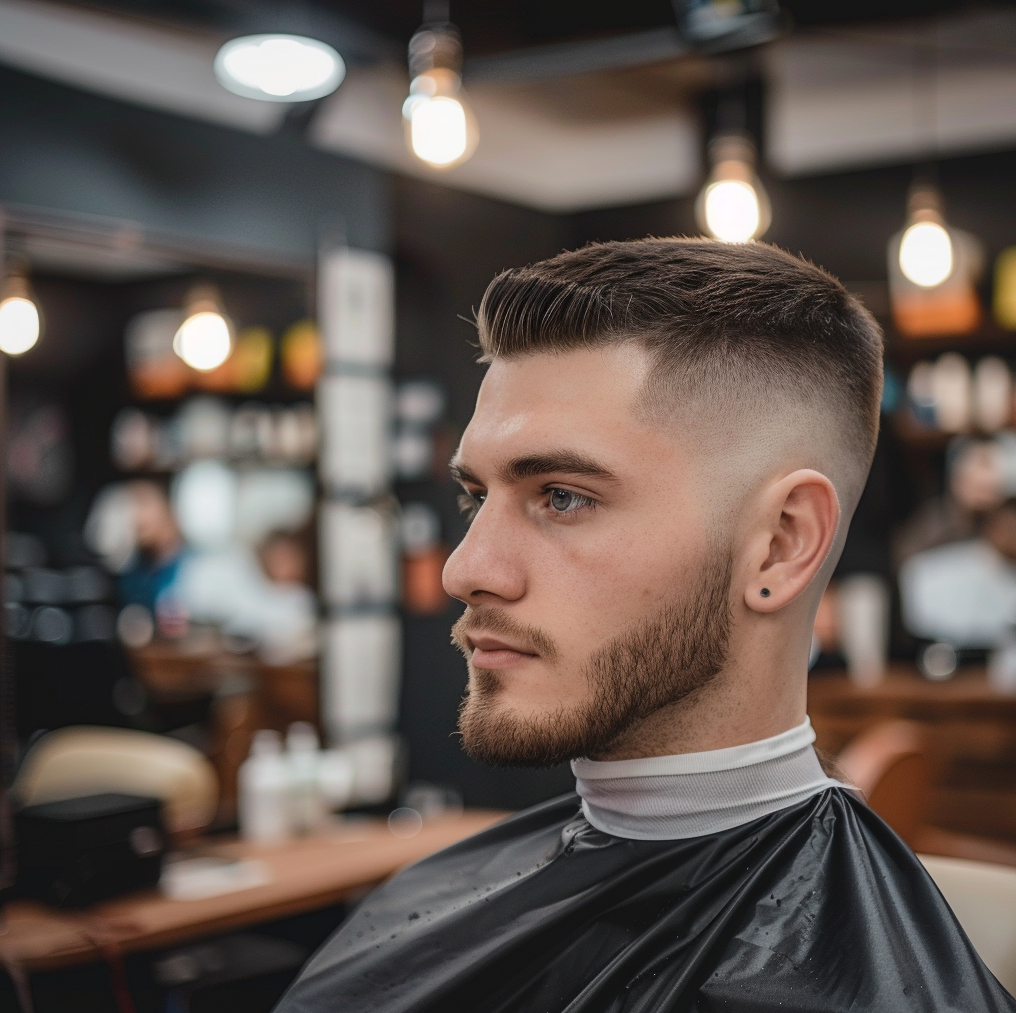
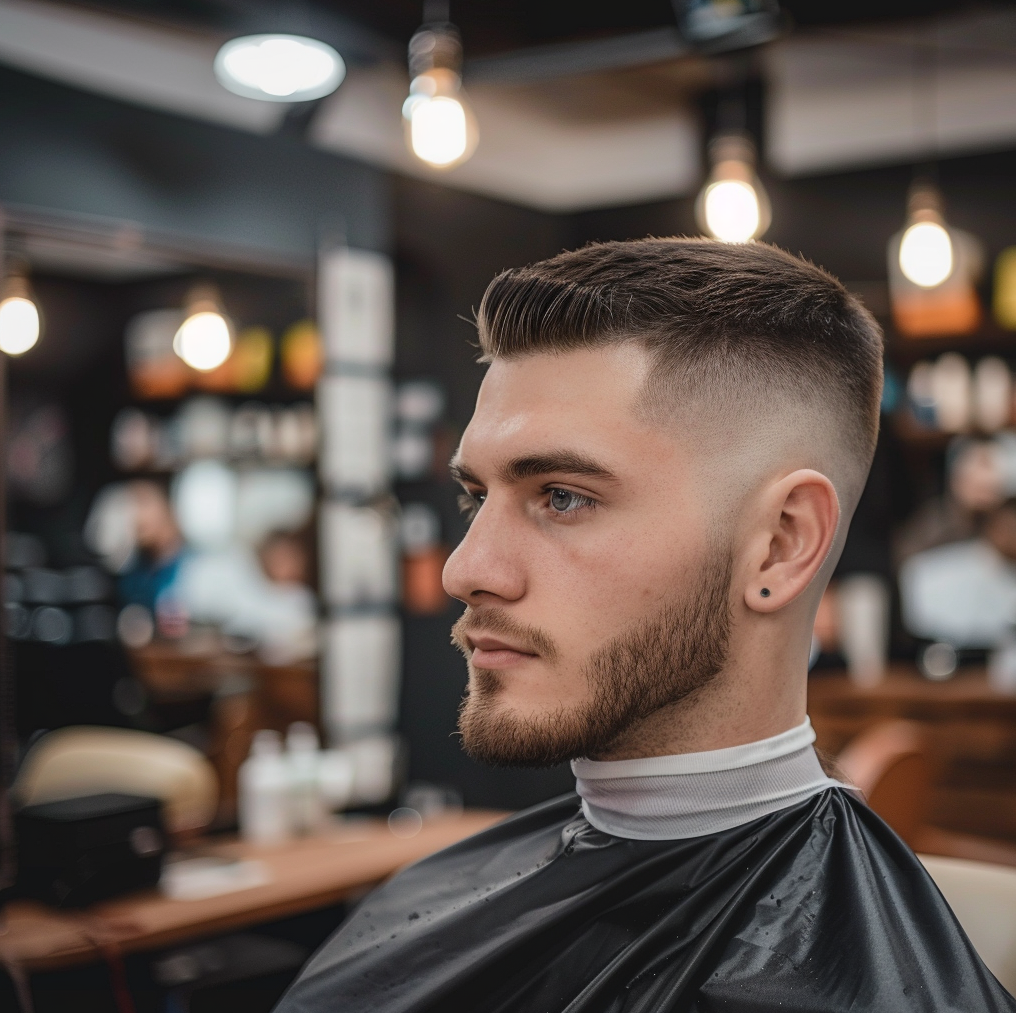
A skin fade is a haircut where the sides and back of the head taper down to bare skin, with length building upward without a single visible line. It looks simple in photos, but it's exactly this cut that exposes technical gaps the fastest: every poorly blended transition casts a shadow and shows from a mile away. Below you'll find the full workflow, from the starting line to the finish, with specifics on clipper angles, guard selection, and sectioning.
What a skin fade is and how it differs from a regular fade
In a skin fade (also called a bald fade), the lowest point of the graduation is shaved skin, with no trace of hair. In a regular fade, you stop the bottom at a 0.5 or 1.5 mm guard, so the skin doesn't show through. This one difference changes the entire job: a skin fade doesn't forgive, because on bare skin every step, every uneven jump, and every under-faded patch is visible.
That's why a skin fade isn't so much about a single guard as it is about the skill of creating a smooth transition from zero to full length over a span of just a few centimeters. The key is working with an open clipper (lever), consciously setting the height of each zone, and blending the boundaries so the eye can't find a point to catch on.
Tools that actually do the work in a skin fade
You don't need much for a clean skin fade, but every piece has its job:
- Clippers with a lever (taper lever) – opening the lever lets you fine-tune length on a micro scale between guards; this does most of the blending work.
- A set of guards – in practice, 0.5 / 1.5 / 3 / 6 / 9 mm are enough; the more intermediate sizes you have, the easier it is to smooth out transitions.
- Trimmer (liner) – for shaving the lowest zone down to the skin and clean lines around the ears and at the nape.
- Scissors and a comb – for the top section and connecting the fade to length using the scissor-over-comb technique.
- Brush and disinfectant spray – clean blades cut evenly, while blades clogged with hair leave streaks.
Clipper quality translates directly into the result: a sharp, well-oiled blade glides smoothly and leaves no lines, while a dull one tugs and forces repeated passes, which create unevenness on their own. You can find more on gear and precision-cutting approaches from Connected Hair educators, including Kamil Cesarski and Bartosz Lącz.
Step 1: Consultation and hair preparation
Before you pick up the clippers, establish two things: how high the fade should go (low – near the ear, mid – at temple height, high – above it) and what length you're leaving on top. These decisions shape the entire composition.
- Wash and thoroughly dry the hair. Wet hair lies differently than dry hair and will distort the length you're removing.
- Comb in the direction of natural growth to catch any cowlicks and changes in direction at the nape.
- Confirm the fade height and top length with the client, ideally using a specific photo rather than vague terms like “short on the sides.”
A good consultation isn't just a formality – it's protection against finishing a haircut only to find the client had a completely different height in mind. Mateusz Poznański covers client communication in more depth.
Step 2: The guideline
The guideline is the lowest point everything will taper down to, and the highest point of the bare-skin zone. This is the foundation: a crooked or asymmetrical line here will translate into a crooked fade further up.
- Using a trimmer with no guard, mark a clean line around the ears and at the nape, keeping the blade flat against the skin.
- Check symmetry by looking at the head from behind and from both profiles – not just one side.
- Plan where the fade should end at the top: this level sets the range within which all the transitions must fit.
The more time you spend getting an even, clean guideline, the less you'll need to fix higher up. Bartosz Lącz also speaks to the precision needed at this starting point.
Step 3: The lowest zone (bald against the skin)
- Work with the clippers on no guard or a trimmer, going down to bare skin only in the lowest zone.
- Guide the blade upward, against the direction of growth, up to about 1-2 cm above the guideline.
- Toward the end of each stroke, gently tilt the clippers away from the skin (start lifting them off the head) so you don't leave a hard edge at the top boundary of the zone.
- Overlap each stroke slightly so you don't leave uncut strips.
The most common mistake at this stage is pressing too hard. Clippers pressed against the skin leave a sharp, cut-off line that's difficult to blend out later. Let the blade do the work and keep a light hand, as Maks Łukaszewicz emphasizes.
Step 4: The middle zone
- Switch to a longer guard (e.g., 1.5 or 3 mm) and work above the lowest zone, moving down 2-3 cm lower.
- At the boundary with the bare skin, use a flicking motion – at the end of each stroke, lift the clippers away from the head in an arc instead of cutting straight through.
- For intermediate lengths, open the clipper lever: the same guard with the lever open gives you a transitional level between two guards.
If you're still learning even transitions, use a comb as a guide and remove length with a clippers-over-comb motion, controlling how much hair remains. Michał Lewiński demonstrates this beginner-friendly method.
Step 5: The top zone and transition to length
- Switch to a longer guard (e.g., 6 or 9 mm), depending on how high you're taking the fade.
- Work up to the height where the fade meets the length on top.
- Break up the top boundary using point cutting (scissors angled, tips pointing into the hair) so the hard line between the sides and top disappears.
The goal in the top zone is to create the illusion that the hair simply grows naturally longer, with no step. This is where it's decided whether the fade looks professional or pieced together from separate strips, as Marek Krzyminski points out.
Step 6: Blending the transitions
This is the stage where the fade either wins or loses. Blending means reworking every boundary between zones until it disappears.
- Go back over every boundary with the clippers and lever, using a flicking motion and opening the lever to soften where two lengths meet.
- Check the result under different lighting and from both profiles – a visible line casts the most obvious shadow from the side.
- Finish the top of the fade with the scissor-over-comb technique to blend it smoothly into the length.
- Use the trimmer to refine the lines around the ears and at the nape.
Blending takes patience and requires looking at the whole picture, not just one section at a time. Kacper Orzechowski focuses on finishing techniques.
Step 7: Washing, drying, and styling
- Wash the head to remove loose hairs – only clean work reveals whether an under-faded patch remains anywhere.
- Blow-dry, shaping the top in the intended direction.
- Apply a styling product matched to the effect you want to achieve.
Matte products with light to medium hold work best for a skin fade – think matte paste or texturizing powder. High shine draws attention away from the clean transition, which is the main selling point here. Aneta Dąbrowska covers product selection for men's styling in more detail.
The most common skin fade mistakes
- Jumping guard sizes too fast – going straight from 0 to 6 mm with no intermediate level leaves a hard step; add 1.5 and 3 mm guards.
- Poorly blended boundaries – a visible line between zones is a sign the clippers didn't go back over the boundary enough.
- Wrong fade height for the face – too high with a low hairline, or too low on a large head, throws off facial proportions.
- Asymmetry – one side higher than the other; check the height from behind, not just from the profile.
- Pressing the clippers into the skin – leaves sharp edges and irritation instead of a smooth start.
You can fix most of these mistakes by going back over the problem boundary with the clippers and taking your time to blend – just be careful not to take the length lower than needed while doing it. Jakub Ciężadlik talks about calmly correcting mistakes.
How to get to even transitions faster
- Practice on a mannequin, deliberately repeating the same fade until the transitions come out clean without corrections.
- Study other barbers' work: break down where the bare skin starts and how they carry the blend.
- Record your own haircuts and watch them back later – on video you'll spot lines you missed behind the chair.
- Keep working on your technique with Connected Hair's online courses and workshops.
An even skin fade is the result of repetition, not talent. Each new haircut teaches your hand what no set of instructions can: a light touch and a feel for the exact moment to lift the clippers off the head. Paweł Pohlheimer, one of Connected Hair's leading educators, walked this same path.
Want to break down the skin fade and pair it with a specific hairstyle? Check out the Side Part Skin Fade course and see the whole process step by step on a real model.
See it in practice: in the Fade from Scratch: Three-Sector System course with Natalia Przytuła, you'll follow the entire process step by step on a model, with commentary from the instructor.


